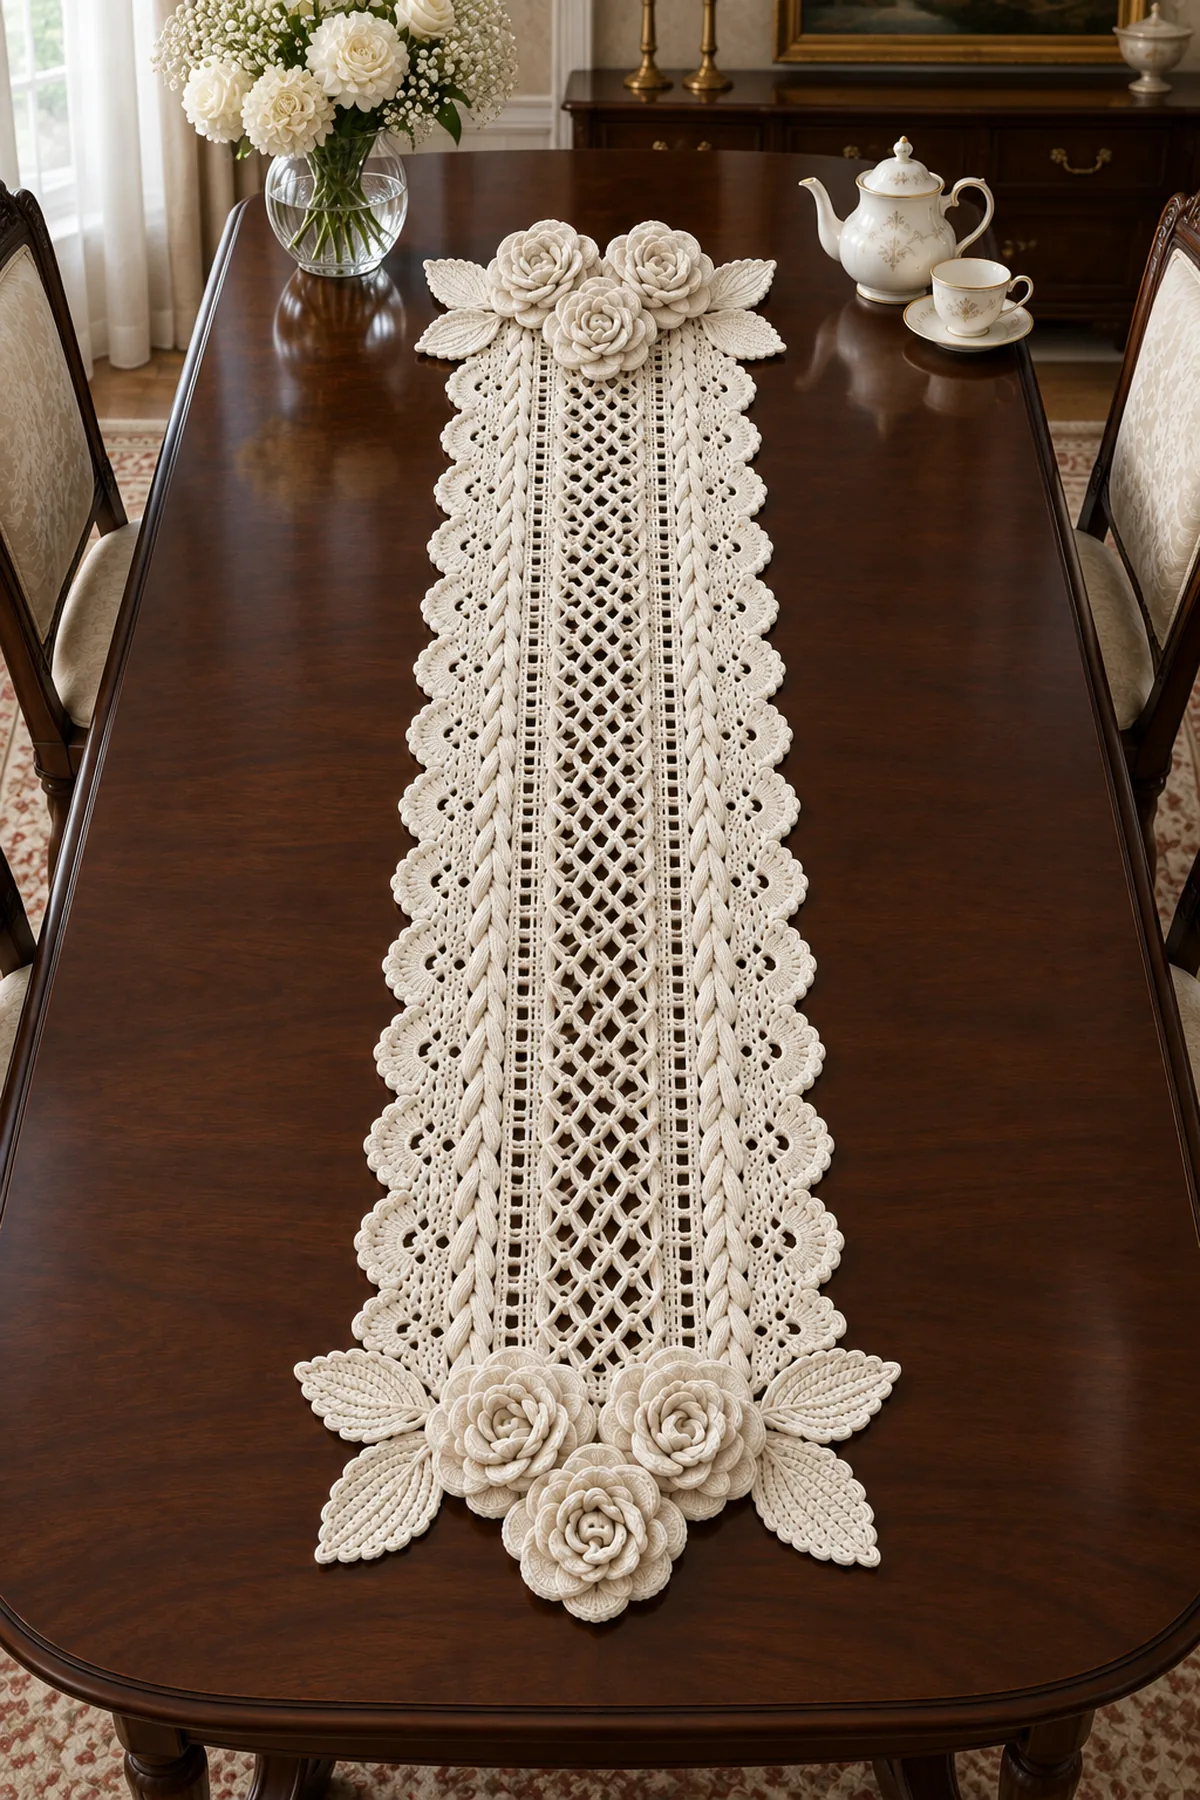
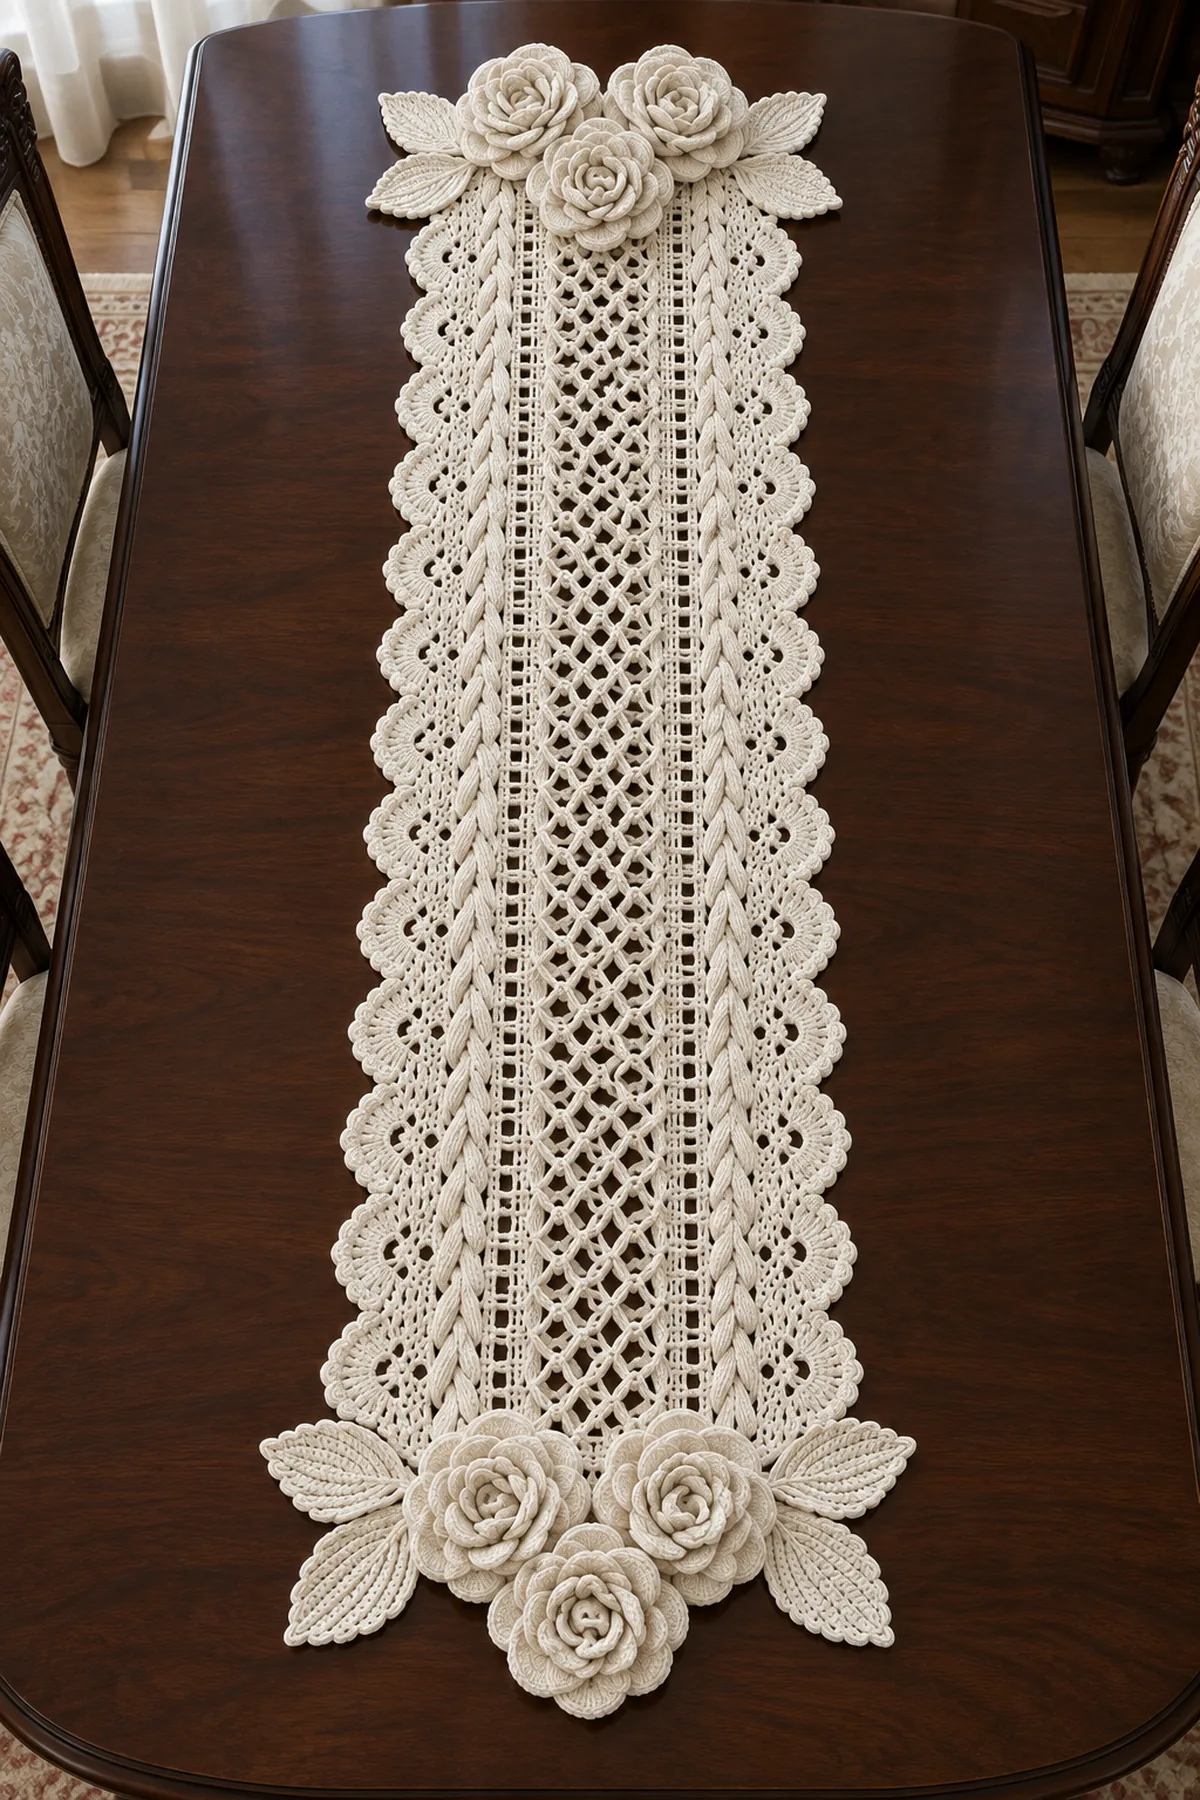
This elegant 3D rose crochet table runner turns a single shade of soft ivory into a rich study of texture. An open diamond lattice runs through the center, raised braided columns frame the mesh, and deep scalloped shells finish both long edges.
Thank you for reading this post, don't forget to subscribe!The runner body is worked as one continuous panel rather than assembled from motifs. Six sculptural spiral roses and eight ribbed leaves are added afterward in matching clusters at the short ends, creating the dramatic floral finish shown in the inspiration while keeping the center usable for table styling.
Why You’ll Love This Rose Runner
Using one color allows every stitch pattern to stand out. The diamond mesh feels light and refined, the cable columns add tailored structure, and the layered roses provide a dimensional focal point. Because the flowers are attached after blocking, you can shape each petal and balance both end clusters before sewing.
Pattern Details
- Skill level: Advanced intermediate
- Hook: 3.5 mm
- Yarn: DK-weight mercerized cotton
- Finished size: Approximately 16 inches wide by 52 inches long
- Gauge: 20 dc and 10 rows equal 4 inches in solid sections
- Terminology: US crochet terms
- Estimated time: 20–26 hours
Materials
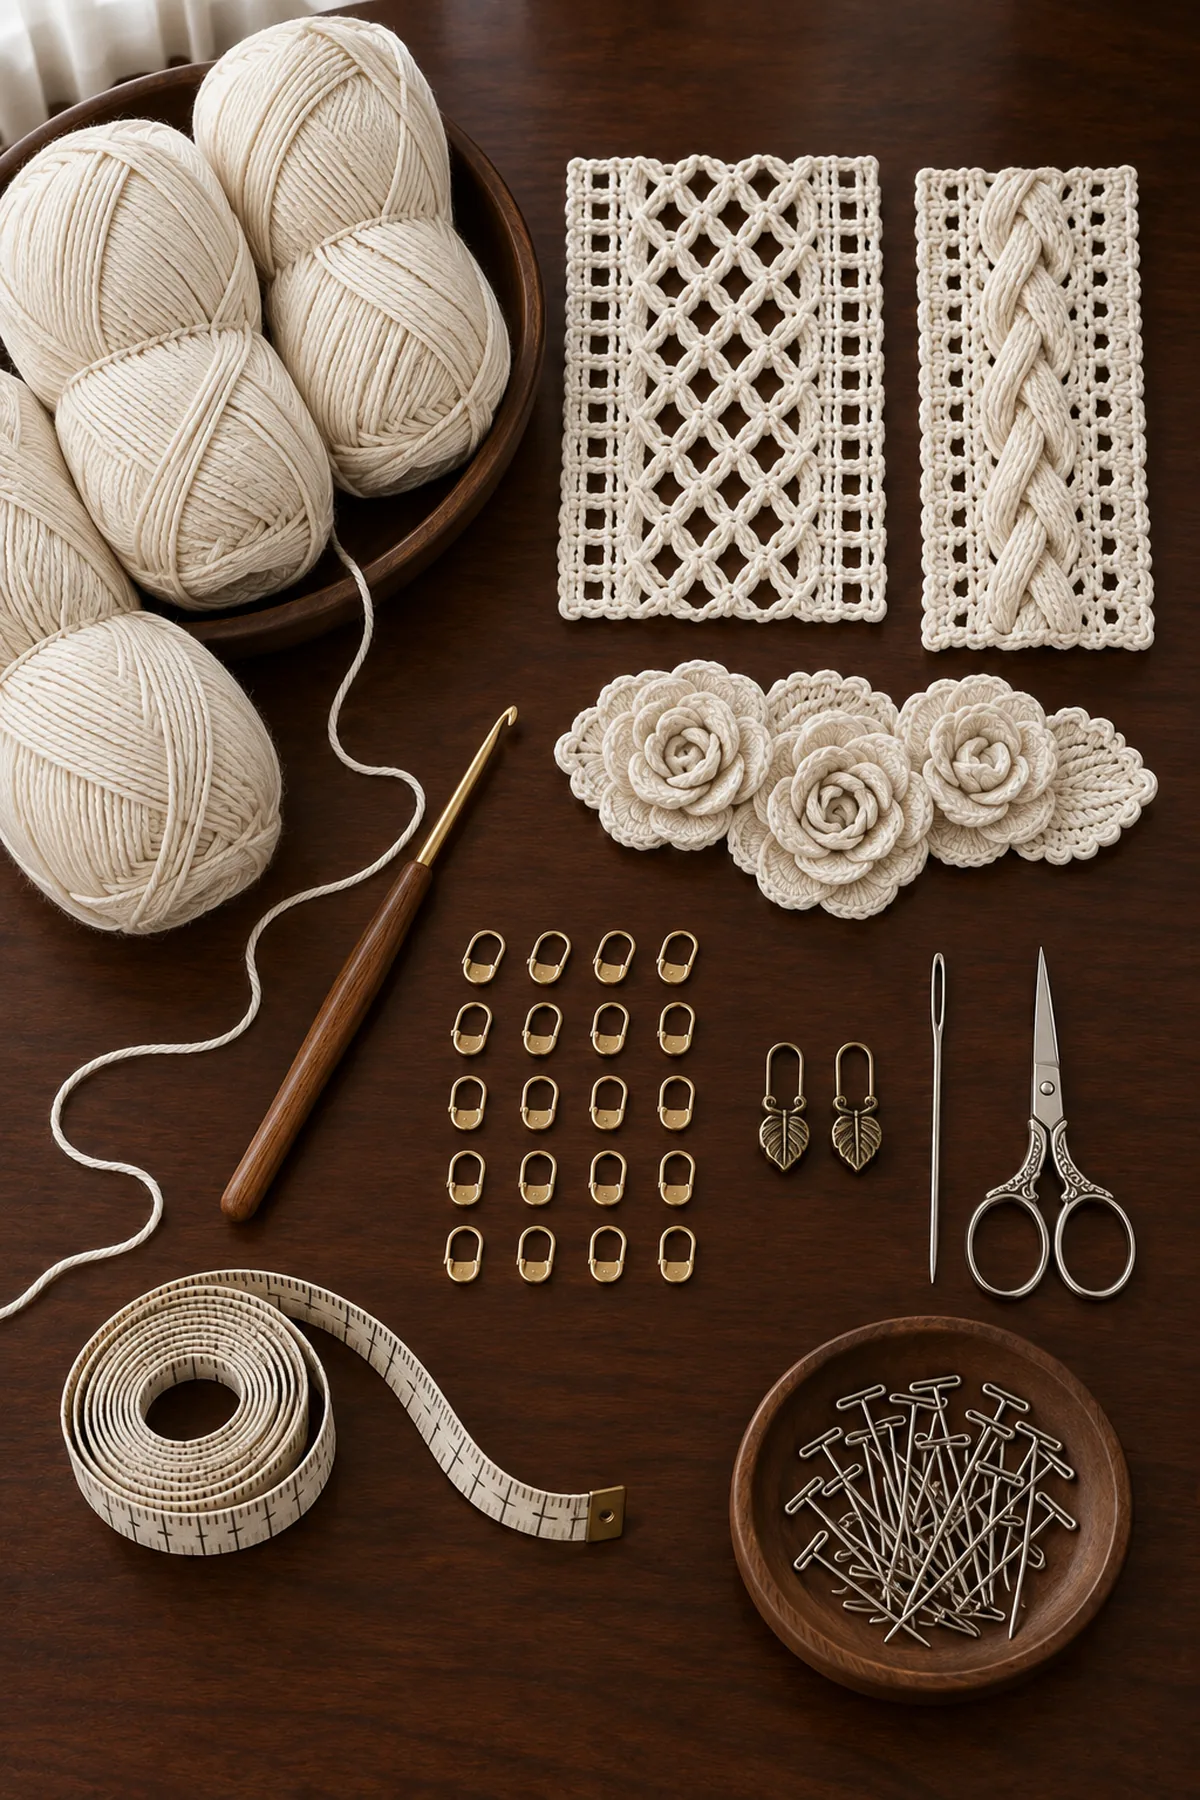
- Approximately 980 yards soft ivory DK-weight mercerized cotton yarn
- 3.5 mm crochet hook
- Two cable markers plus twenty-four locking stitch markers
- Yarn needle
- Small sharp scissors
- Tape measure
- Blocking mats and rustproof pins
Gauge, Measurements, and Layout
The main body begins with a 73-stitch foundation row and grows to approximately 46 inches before the end borders and appliques. The central mesh occupies 25 stitch positions. Each raised cable column uses eight positions, and the remaining stitches form stabilizing rails and edge sections.
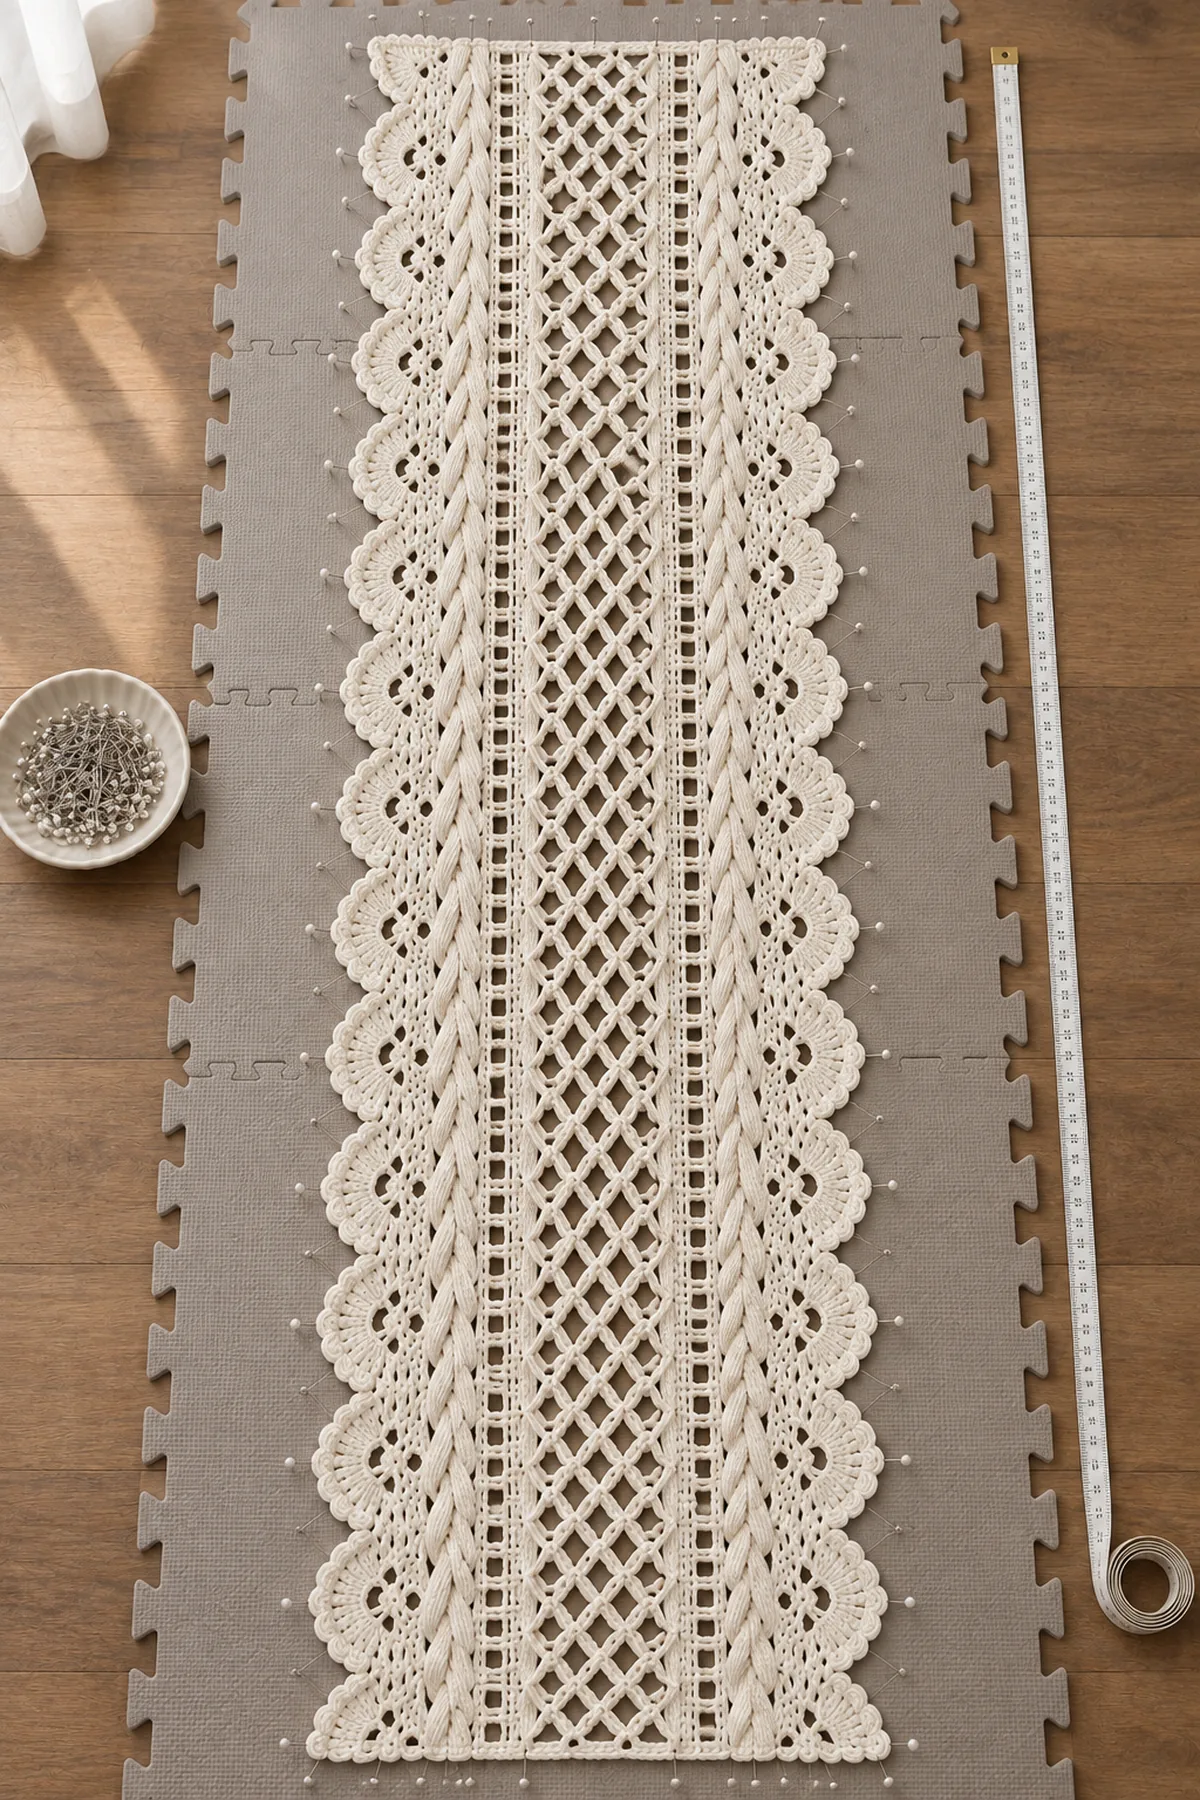
After the scalloped borders are complete, the body should block to about 16 by 52 inches. Make six roses in two sizes: four large roses and two medium roses. Arrange three roses and four leaves at each short end.
Abbreviations and Special Stitches
- ch: chain
- dc: double crochet
- hdc: half double crochet
- sc: single crochet
- sl st: slip stitch
- tr: treble crochet
- FPdc: front post double crochet
- BPdc: back post double crochet
- st(s): stitch(es)
- sp: space
Diamond mesh: Ch 3, skip 2 stitches, sc in the next stitch.
Raised cable cross: Skip two post stitches, work FPtr around each of the following two posts, then work FPtr around both skipped posts.
Rose petal group: Work 2 dc, 3 tr, and 2 dc in one chain space.
Shell: Work 2 dc, ch 2, and 2 dc in one space.
Before You Begin
- Beginning chains do not count as stitches unless stated.
- Place contrasting markers before and after both cable columns.
- Count all 73 stitch positions at the end of every body row.
- Block the completed body before pinning the flowers and leaves.
Elegant 3D Rose Crochet Table Runner Instructions
Foundation and Setup Rows
- Foundation Row: Ch 76. Dc in the fourth chain from the hook and in every remaining chain. Turn. (73 sts)
- Setup Row 2: Ch 3, dc in every stitch across. Turn. (73 sts)
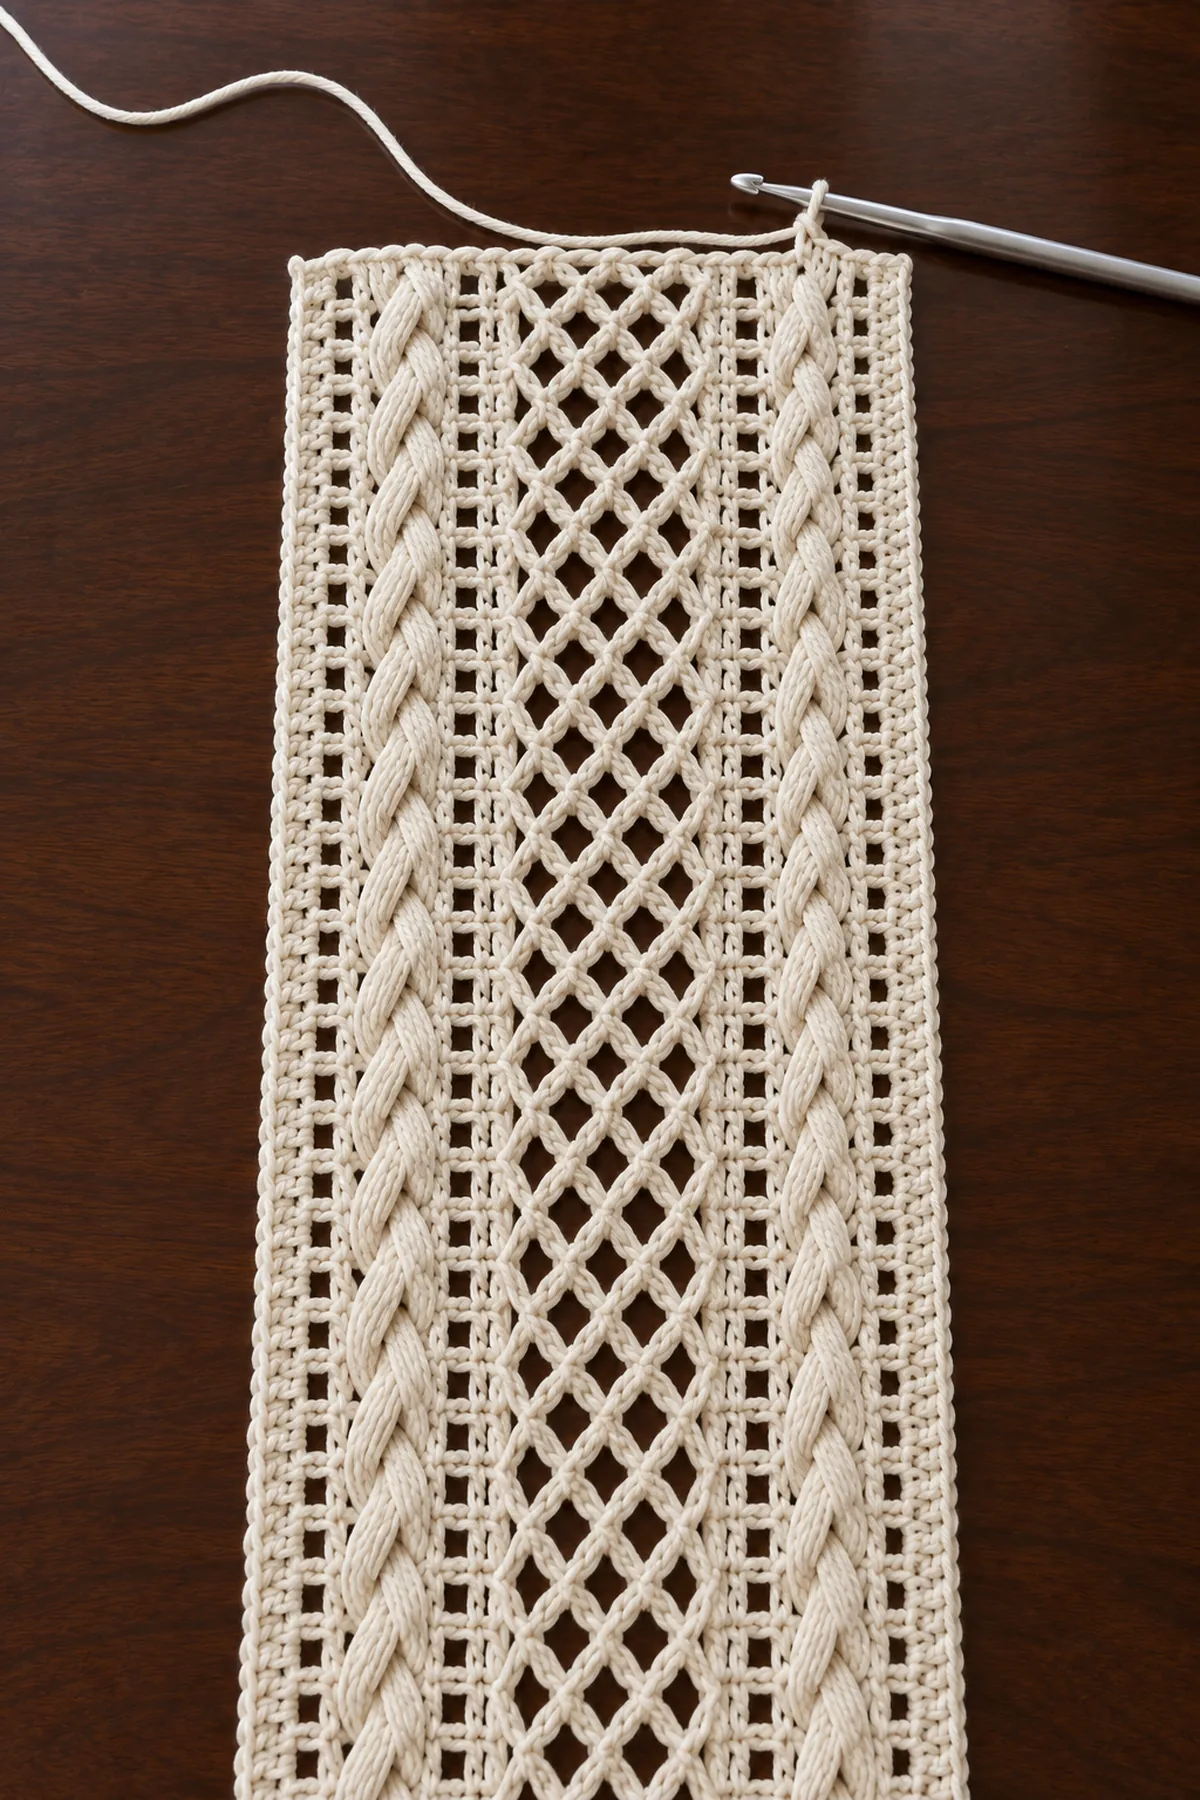
- Setup Row 3: Ch 3, dc in next 11 stitches, FPdc around next 8 stitches, dc in next 7 stitches, work the 25-position diamond-mesh setup, dc in next 7 stitches, FPdc around next 8 stitches, dc in final 12 stitches. Turn. (73 sts)
Work the Diamond Lattice and Cable Body
Keep the outer rails in double crochet, maintain the open center, and cross each raised column on every fourth right-side row.
- Pattern Row A: Ch 3, dc across the first rail, BPdc around each marked cable post, work diamond mesh across the center, BPdc around the second cable column, then dc across the final rail. Turn.
- Pattern Row B: Ch 3, dc across the rail, FPdc around each cable post, work sc in each mesh anchor and ch 3 across every opening, FPdc around the second column, then dc across the final rail. Turn.
- Cable Row: Work the rails and mesh as established. At each cable column, cross four posts over four posts in two paired cable crosses.
- Repeat Rows A and B, using one Cable Row after every three uncrossed rows, until the body measures 46 inches and ends after a wrong-side row.
- Work two final rows of dc across all 73 positions to stabilize the second short edge. Fasten off.
Add the Wide Scalloped Side Borders
- Join ivory yarn at one long edge. Work sc evenly along the row ends, placing one marker at every eighth section.
- Border Row 2: Repeat [skip 2 stitches, 7 dc in next stitch, skip 2 stitches, sc in next stitch] along the edge. Adjust only within the final marked section if necessary.
- Border Row 3: Work one shell in the center dc of every seven-dc fan and sc between neighboring fans.
- Border Row 4: Repeat [sc in shell space, ch 3, small picot, ch 3, sc in next shell space] to form pointed scallops.
- Repeat all four border rows along the second long edge, matching each scallop directly opposite the first side.
Make Four Large Spiral Roses
- Ch 67. Dc in the fourth chain from the hook, ch 1, skip 1, then repeat [dc, ch 1, skip 1] across.
- Turn. Work one rose petal group in every chain-1 space. The strip will curl naturally.
- Starting at the smaller end, roll the strip into a layered rose. Keep the foundation edge aligned underneath.
- Sew through every rolled layer across the base and leave a 20-inch attachment tail.
Make Two Medium Roses
- Ch 49 and repeat the same mesh-strip method used for the large roses.
- Work one petal group in every chain-1 space, roll tightly, and sew securely across the base.
- Shape the outer petals downward and lift the center spiral.
Make Eight Ribbed Leaves
- Ch 21. Sl st in the second chain, then work sc, hdc, 14 dc, hdc, sc, and sl st along the chain.
- Working along the opposite side, repeat the same sequence back toward the stem.
- Work one round of reverse sc around the leaf, placing ch 2 at the tip.
- Surface-slip-stitch along the center chain to create a raised vein. Fasten off with a long sewing tail.
Assemble the Two Rose Clusters
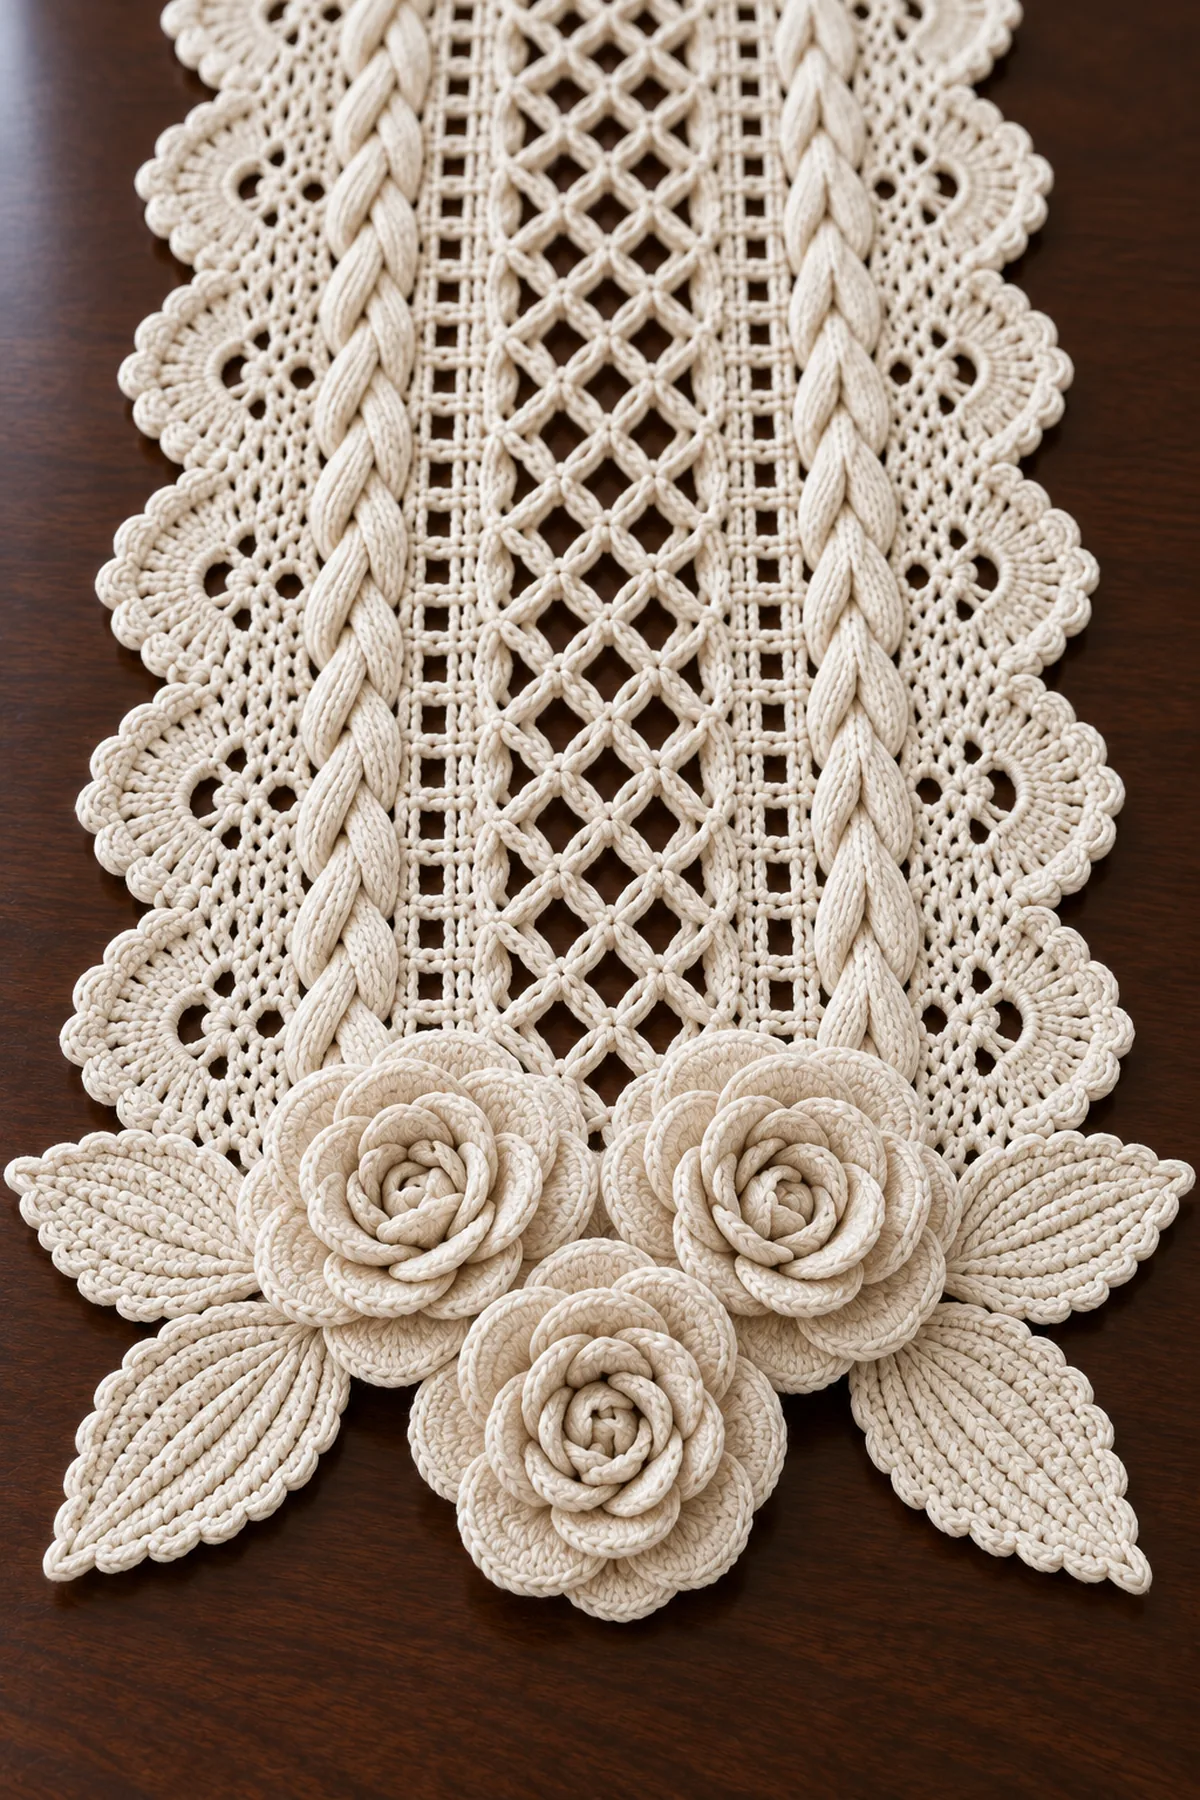
- At the first short end, place two large roses side by side and one medium rose centered slightly below them.
- Fan four leaves behind the flowers: one at each outer side and two angled toward the center.
- Repeat the mirrored arrangement at the opposite short end using the remaining roses and leaves.
- Sew every leaf first through its center vein and lower edge. Sew each rose through the firm rolled base without flattening the outer petals.
Assembly and Shaping
Pin the runner body to measurement before adding any applique. Keep both flower clusters centered on the long axis and ensure the end roses extend equally beyond the short edges. The cable columns should disappear naturally beneath the side roses while the central diamond lattice remains visible between the two clusters.
Finishing
- Weave body tails through the dense outer rails, never across open mesh.
- Secure each rose tail in three directions beneath the rolled base.
- Anchor leaf tips lightly while leaving their ribbed edges dimensional.
- Mist the runner, reshape every scallop, and steam above the lace without touching or flattening the roses.
Helpful Tips
- Use mercerized cotton to emphasize the raised cable stitches and keep the lace crisp.
- Place markers around each cable column before starting the mesh section.
- Count the 73 positions on every fourth row and after each cable cross.
- Roll all six flower strips in the same direction for matching roses.
- Hand-wash in cool water, support the flower clusters when lifting, and dry flat.
Frequently Asked Questions
Can I use a different color?
Yes. Soft gray, antique white, blush, or deep burgundy will all show the textured stitches clearly. A single color keeps the lace, cables, and flowers visually unified.
How can I make the runner longer?
Repeat the established cable-and-mesh rows until the body reaches your preferred length, ending after a wrong-side row before the final two stabilizing rows.
Why is my center mesh pulling inward?
The chain-3 spaces may be too tight. Make the mesh chains loosely or use a hook one size larger only for those chains, then return to the main hook for solid stitches.
Conclusion
The completed elegant 3D rose crochet table runner combines open diamond lace, architectural cable columns, sculpted shell edging, and six dramatic flowers in one refined monochrome design. Careful blocking preserves the long straight panel while shaped roses and leaves give both ends a luxurious finish.
Printable Crochet Pattern Card
Project: Elegant 3D Rose Crochet Table Runner
Skill level: Advanced intermediate Hook: 3.5 mm Yarn: DK cotton
Finished size: Approximately 16 inches wide by 52 inches long
Card Materials
- 980 yards soft ivory DK-weight mercerized cotton
- 3.5 mm hook, markers, needle, scissors, tape measure, and blocking tools
Card Instructions
- Body: Work the 73-stitch panel with central diamond mesh and two raised cable columns to 46 inches.
- Edges: Add four rows of shells, open chains, and pointed picots to both long sides.
- Roses: Make four large and two medium spiral roses.
- Leaves: Make eight ribbed ivory leaves with raised center veins.
- Assembly: Arrange three roses and four leaves at each short end, sew securely, and reshape the lace.
Finish: Weave all ends, lift the rose petals, open every scallop, and inspect the cable crossings.