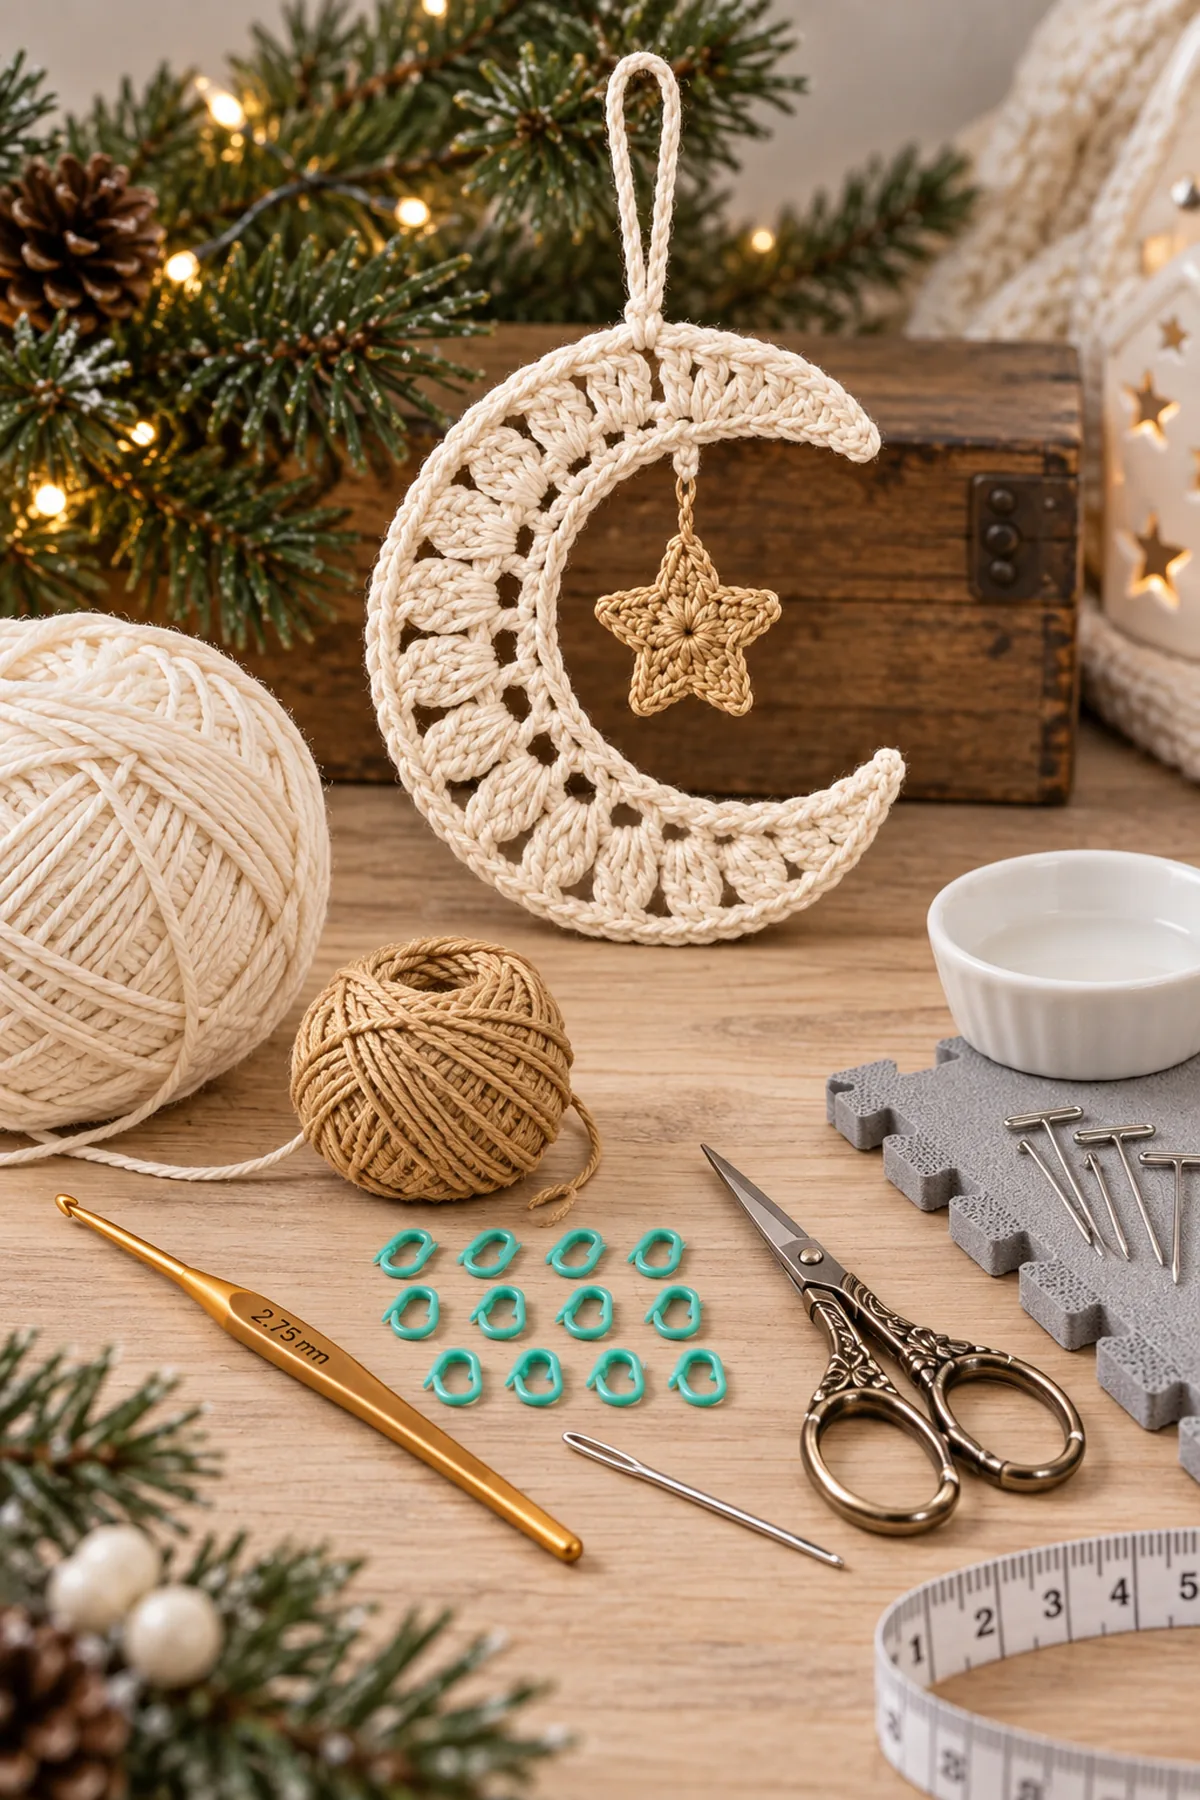
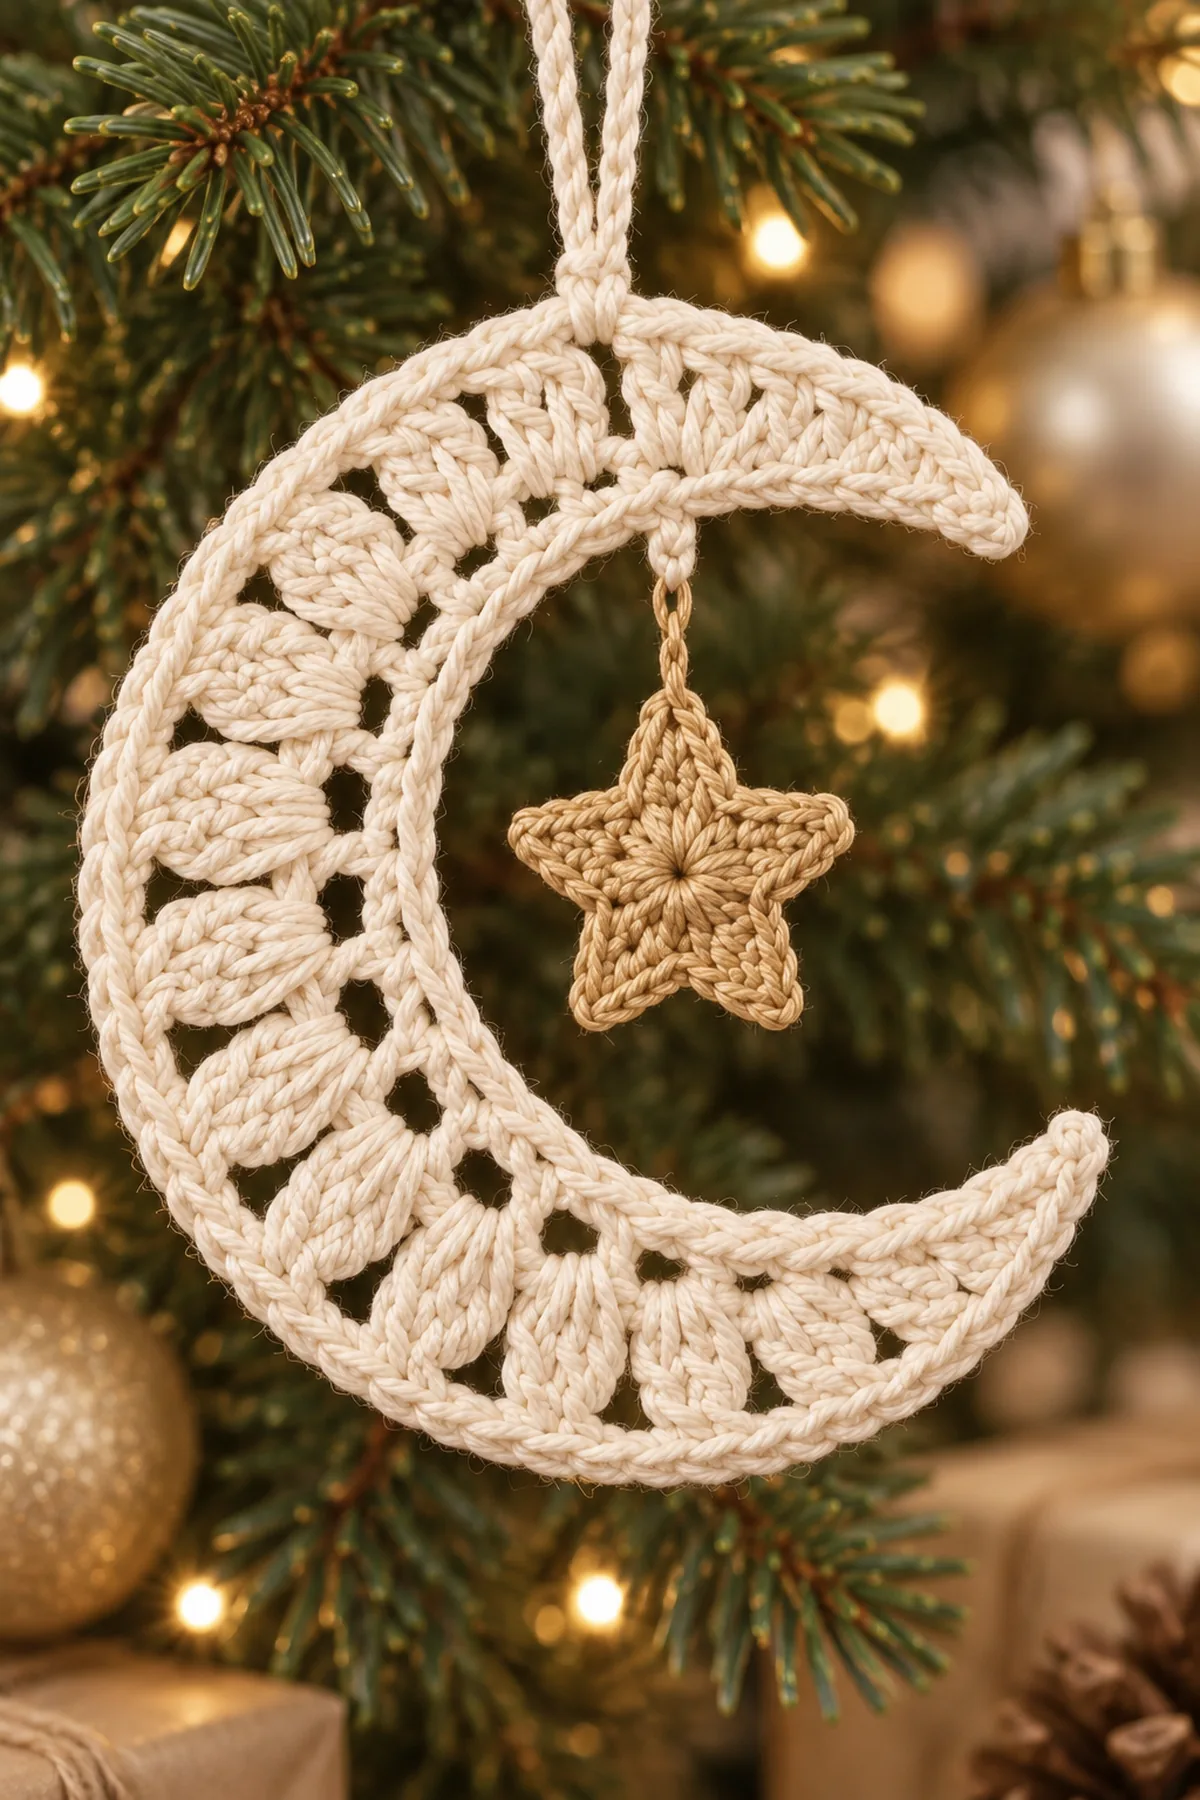
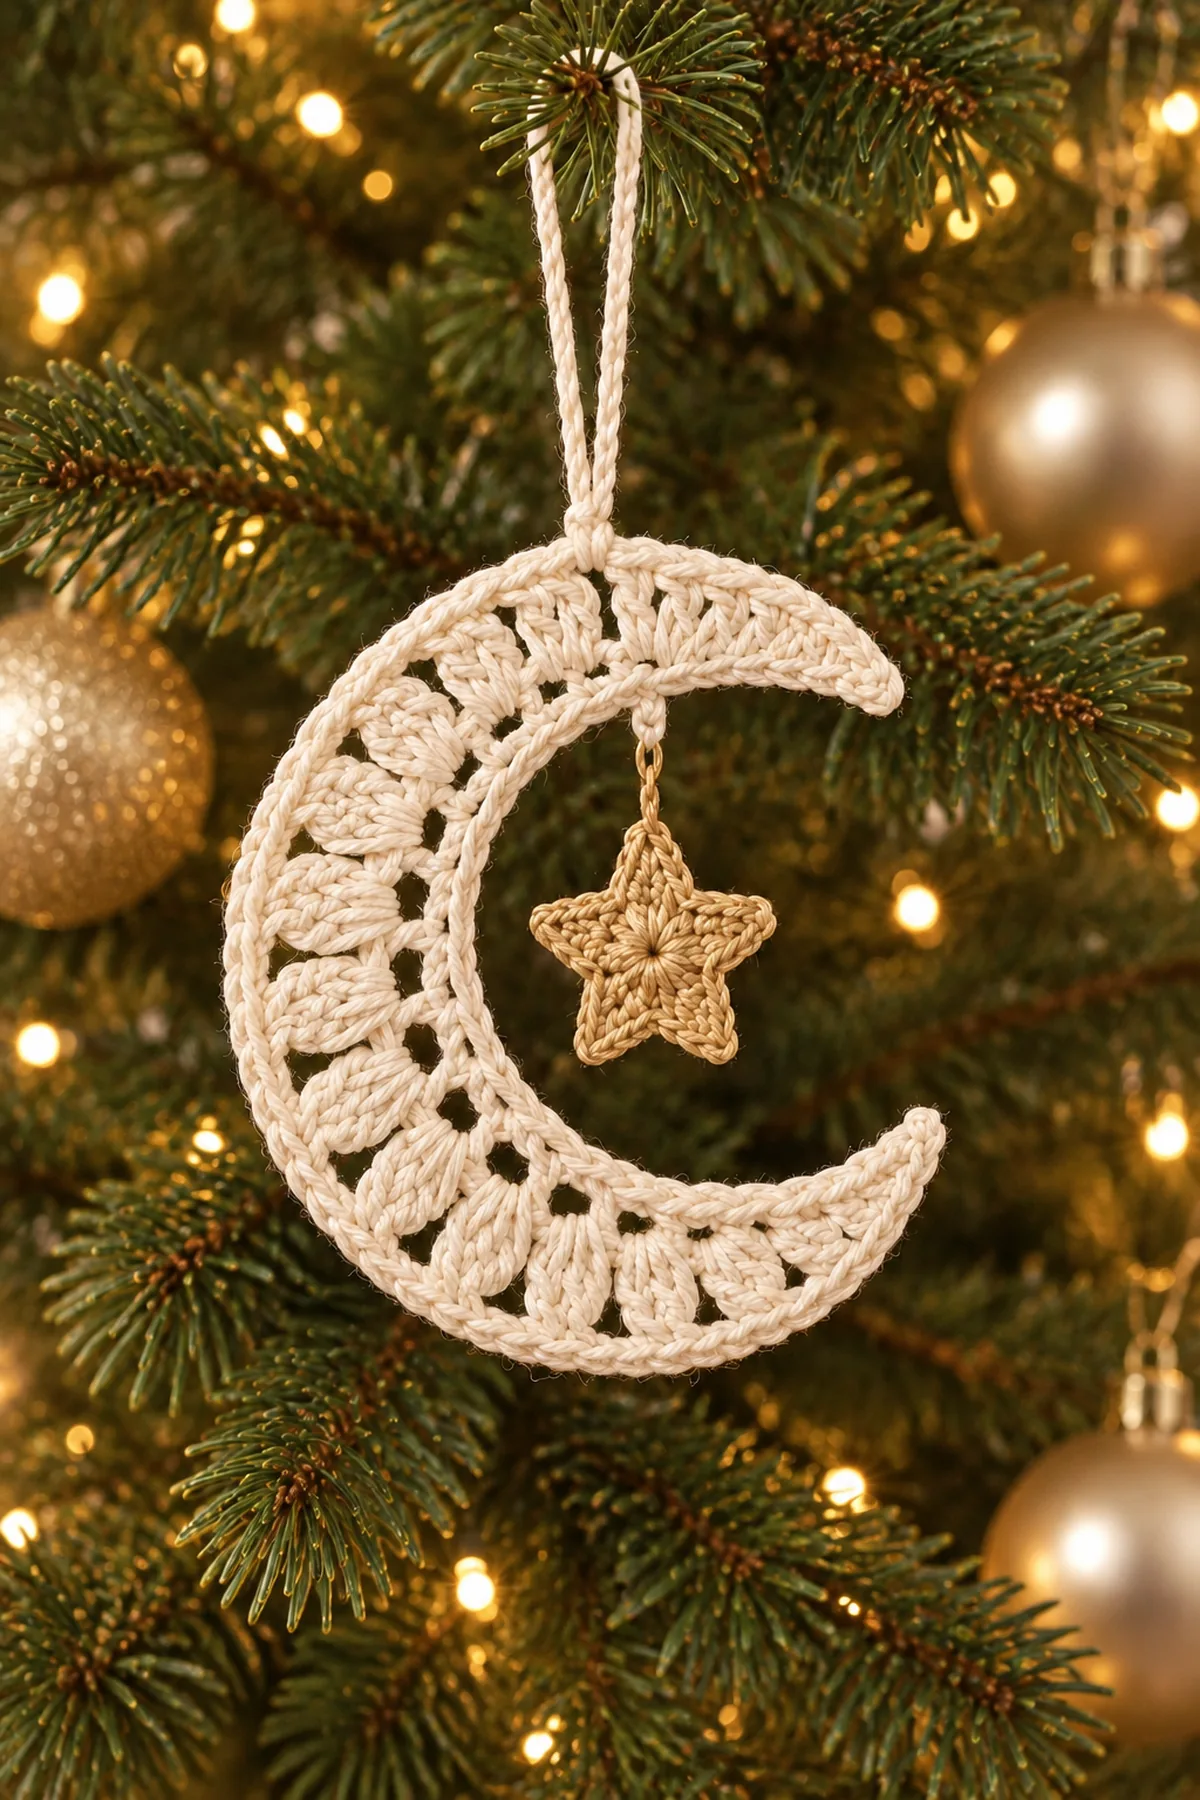
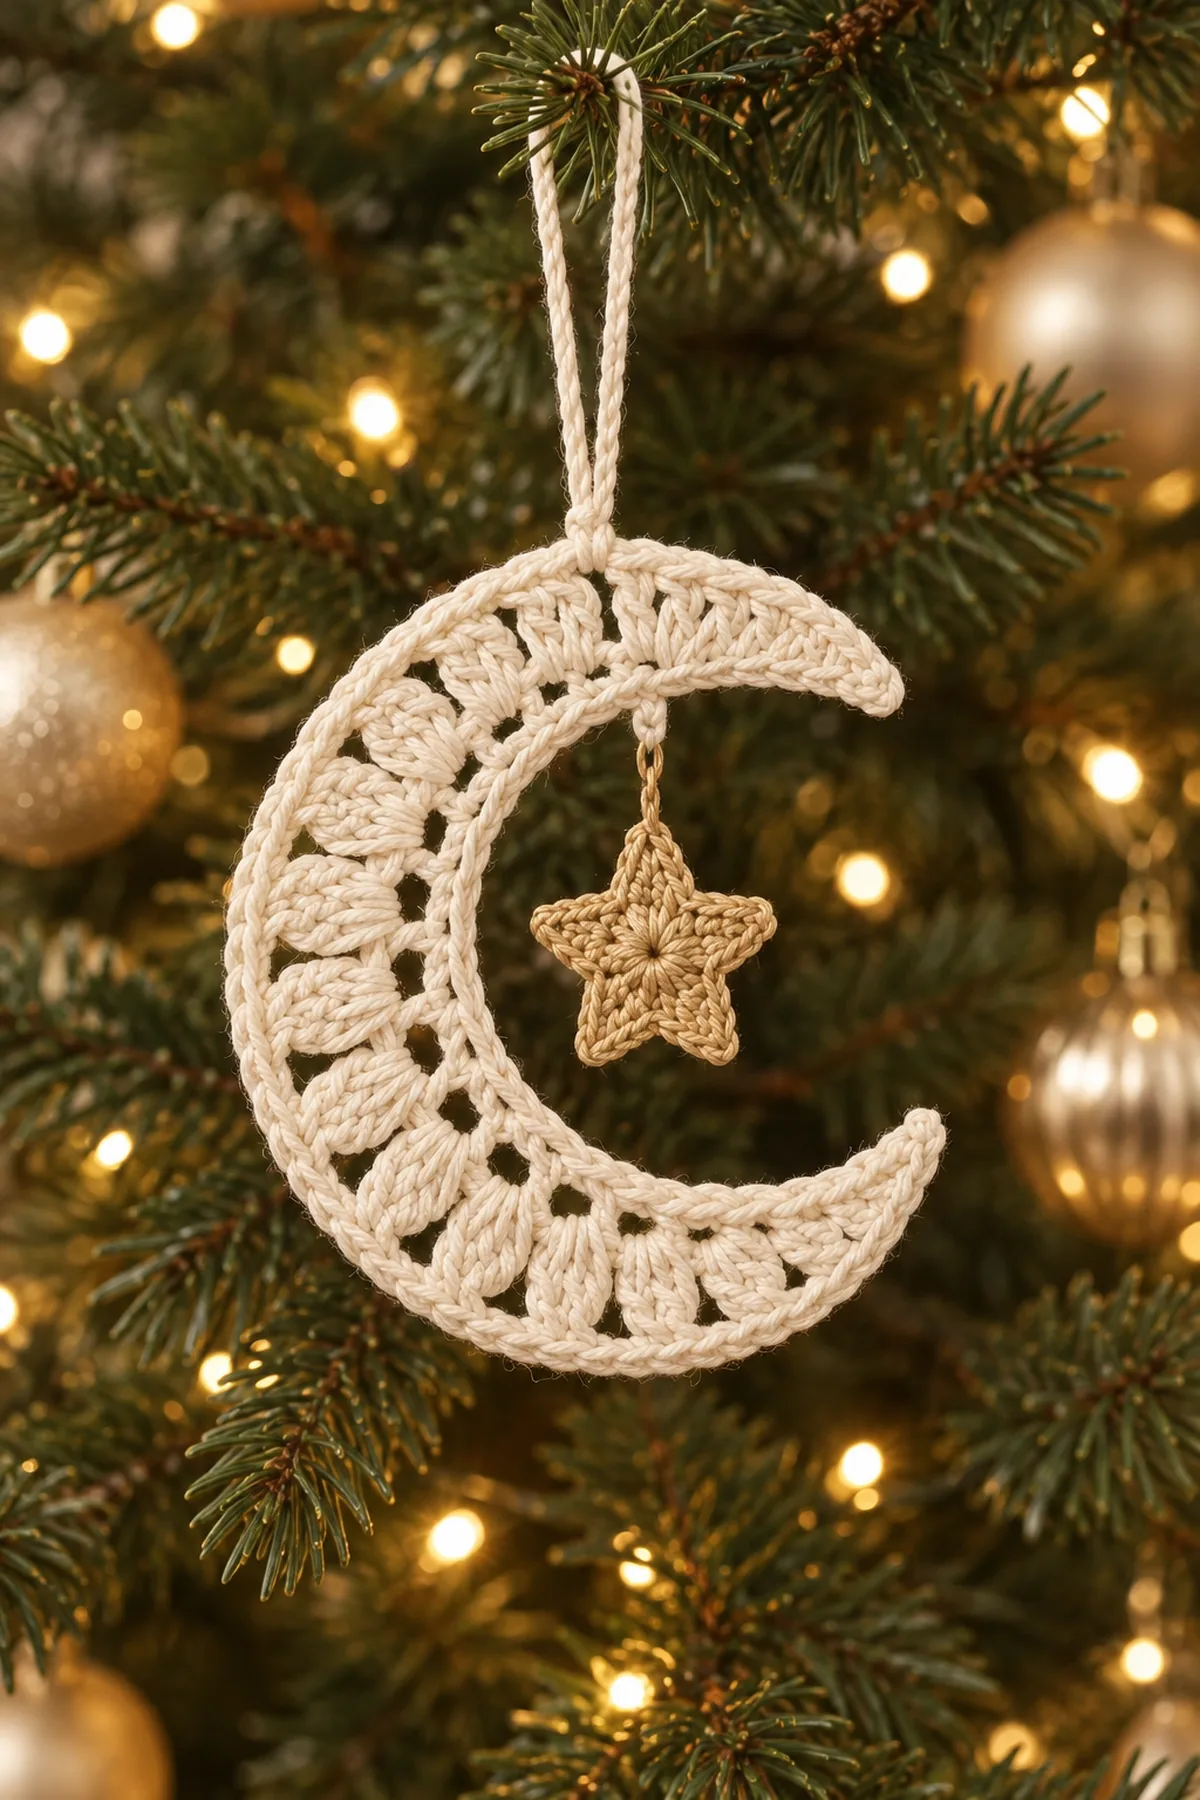
This Crochet Crescent Moon & Star Christmas Ornament follows the supplied photo as a delicate openwork crescent rather than a solid moon applique. A warm-ivory curved band frames twelve radiating fan motifs, narrowing cleanly to two points on the open right side. One small camel-gold five-point star hangs in the center opening from a short chain, while a doubled ivory loop at the top makes the finished piece ready for a Christmas tree branch. Firm edging and careful blocking keep the crescent crisp without adding wire or a separate ring.
Thank you for reading this post, don't forget to subscribe!Begin with a counted curved foundation and mark twelve equal three-stitch sections. Build one open fan in every section, increasing the height and width toward the outside edge so the strip bends into a crescent. Use short rows at both ends to taper the upper and lower tips. Add one continuous single-crochet outline around both crescent edges. Crochet one separate five-point gold star and suspend it from the upper inner curve, then attach one reinforced ivory hanging loop and block the ornament to the reference shape.
Why You’ll Love This Project
The ornament looks intricate while relying on repeated fan wedges and one small star. The open spaces let tree lights shine through, the ivory-and-gold palette feels classic, and the project uses very little yarn. Once the shaping method is familiar, matching ornaments can be made quickly for gifts or a coordinated tree.
Materials
- About 165 yards warm-ivory sport-weight mercerized cotton for the crescent and hanging loop
- About 35 yards camel-gold sport-weight cotton for one dangling star and its suspension chain
- 2.75 mm crochet hook
- Yarn needle, scissors, twelve locking stitch markers, tape measure, blocking mat, and rustproof pins
- Optional diluted fabric stiffener or starch for a crisp tree ornament
Gauge, Measurements, and Planning
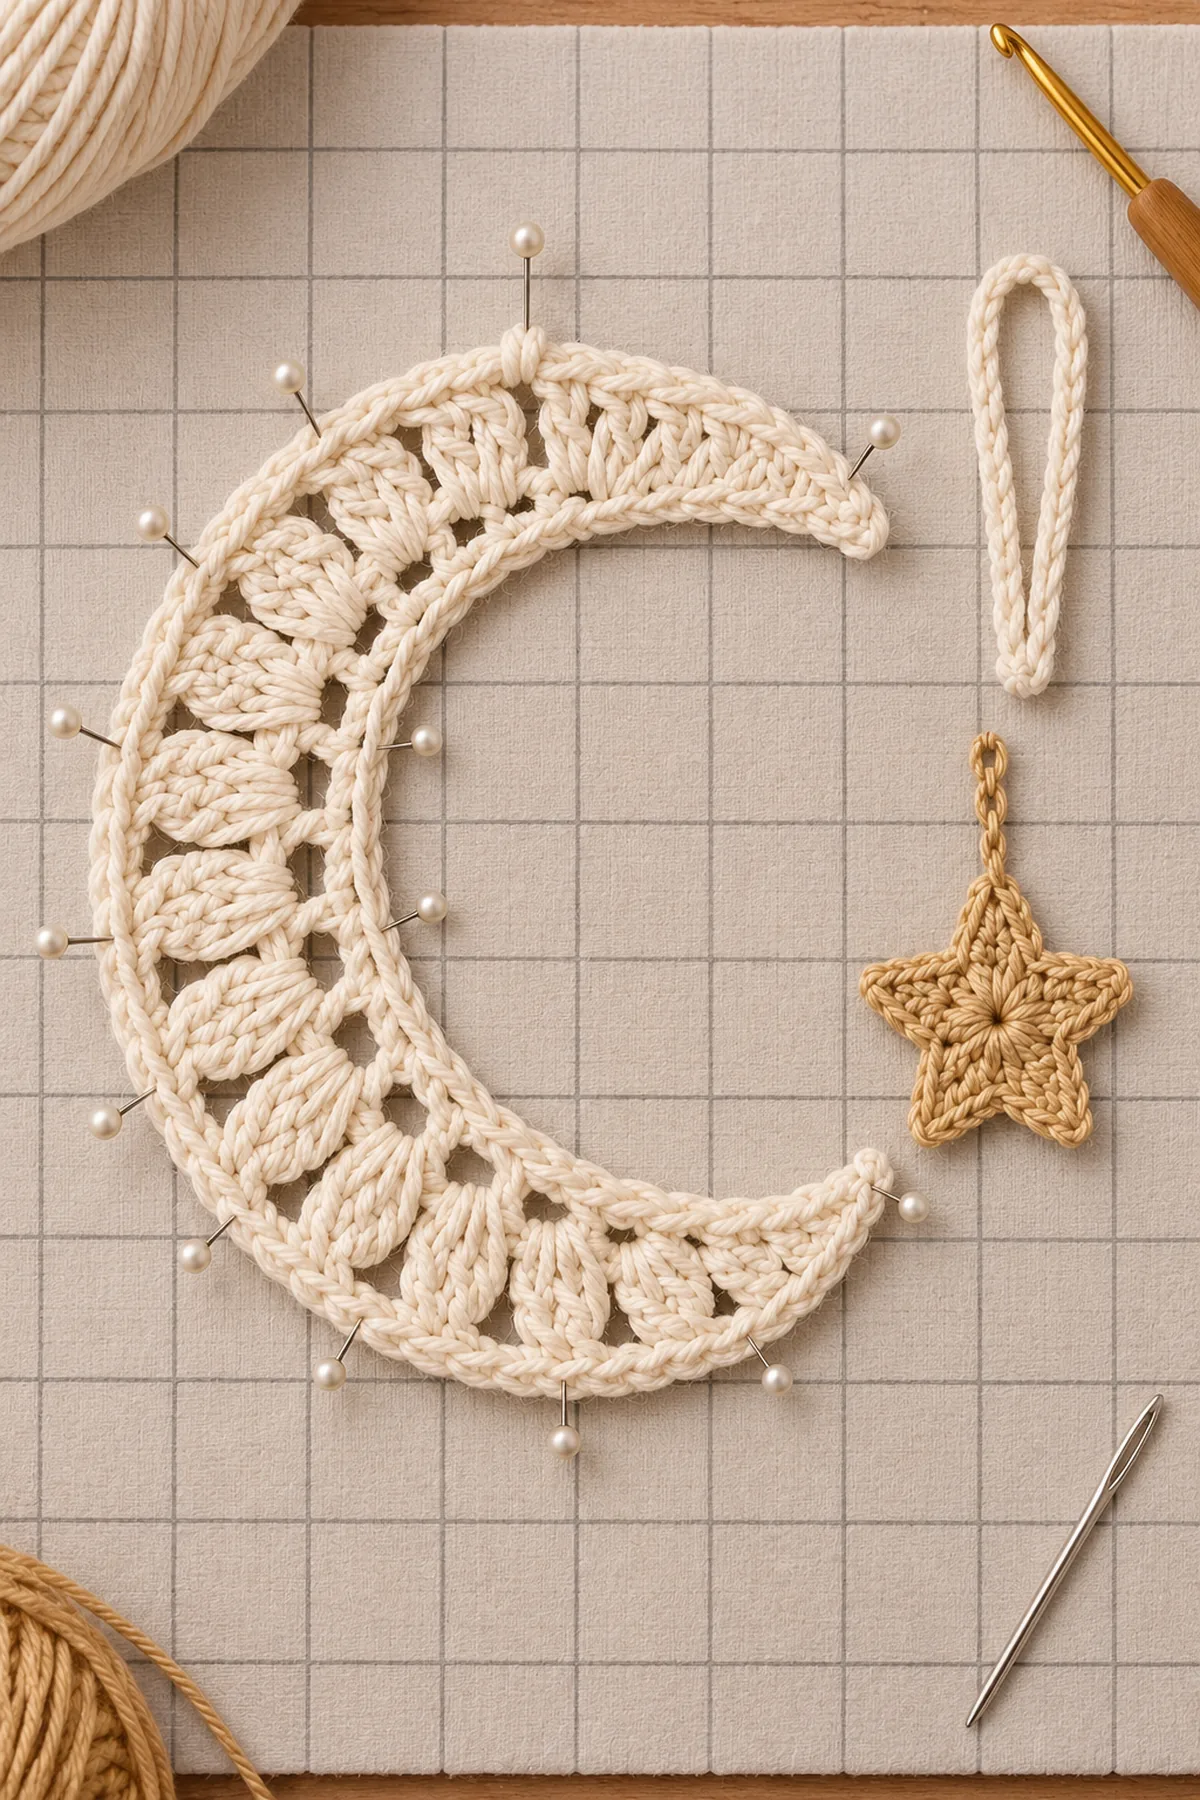
The 36-stitch foundation should measure approximately 7.25 inches before shaping. After the twelve fan wedges and outer edge are complete, pin the crescent to an 8.5-by-9-inch template. The star should block to approximately 2.25 inches across and hang with at least 1 inch of clear space from the inner crescent edge.
Make and wash a gauge swatch before beginning. Measure only after the swatch is completely dry. If the stitch width differs, change hook size rather than pulling the working yarn tighter. Keep a written count at the end of every section so the finished edges remain balanced and the assembly points line up.
Abbreviations and Special Stitches
- ch: chain
- sc: single crochet
- hdc: half double crochet
- dc: double crochet
- tr: treble crochet
- sl st: slip stitch
- sp: space
- st(s): stitch(es)
Special stitch guidance: Open crescent fan: work two dc, ch 2, and two dc into one marked chain space, then expand the next row with a three-double-crochet cluster on each side of the center opening. Radiating puff: yarn over and draw up a loop three times in the same space, yarn over and pull through all loops, then ch 1 to close. Star point: work sc, hdc, dc, tr, dc, hdc, sc into one chain arch. Firm cord: slip stitch back through every chain without twisting it.
Before You Begin
- Make one crescent moon and one dangling star; do not add extra stars, beads, tassels, bells, or facial features.
- Keep the crescent warm ivory and the star camel gold, matching the supplied design.
- The opening faces right and both ends taper to sharp points.
- Work exactly twelve radiating fan-lace wedges between the inner and outer edges.
- Suspend the star near the center of the opening from the upper inner curve so it hangs freely.
- The hanging loop is centered at the top outer edge and uses ivory yarn held double.
Instructions
Establish the Curved Inner Crescent Edge
Mark twelve equal sections before introducing the open fan lace.
- With warm ivory, ch 38. Starting in the third chain, hdc across. (36 sts)
- Row 2: Ch 2, turn, and work one hdc in each stitch across. (36 sts)
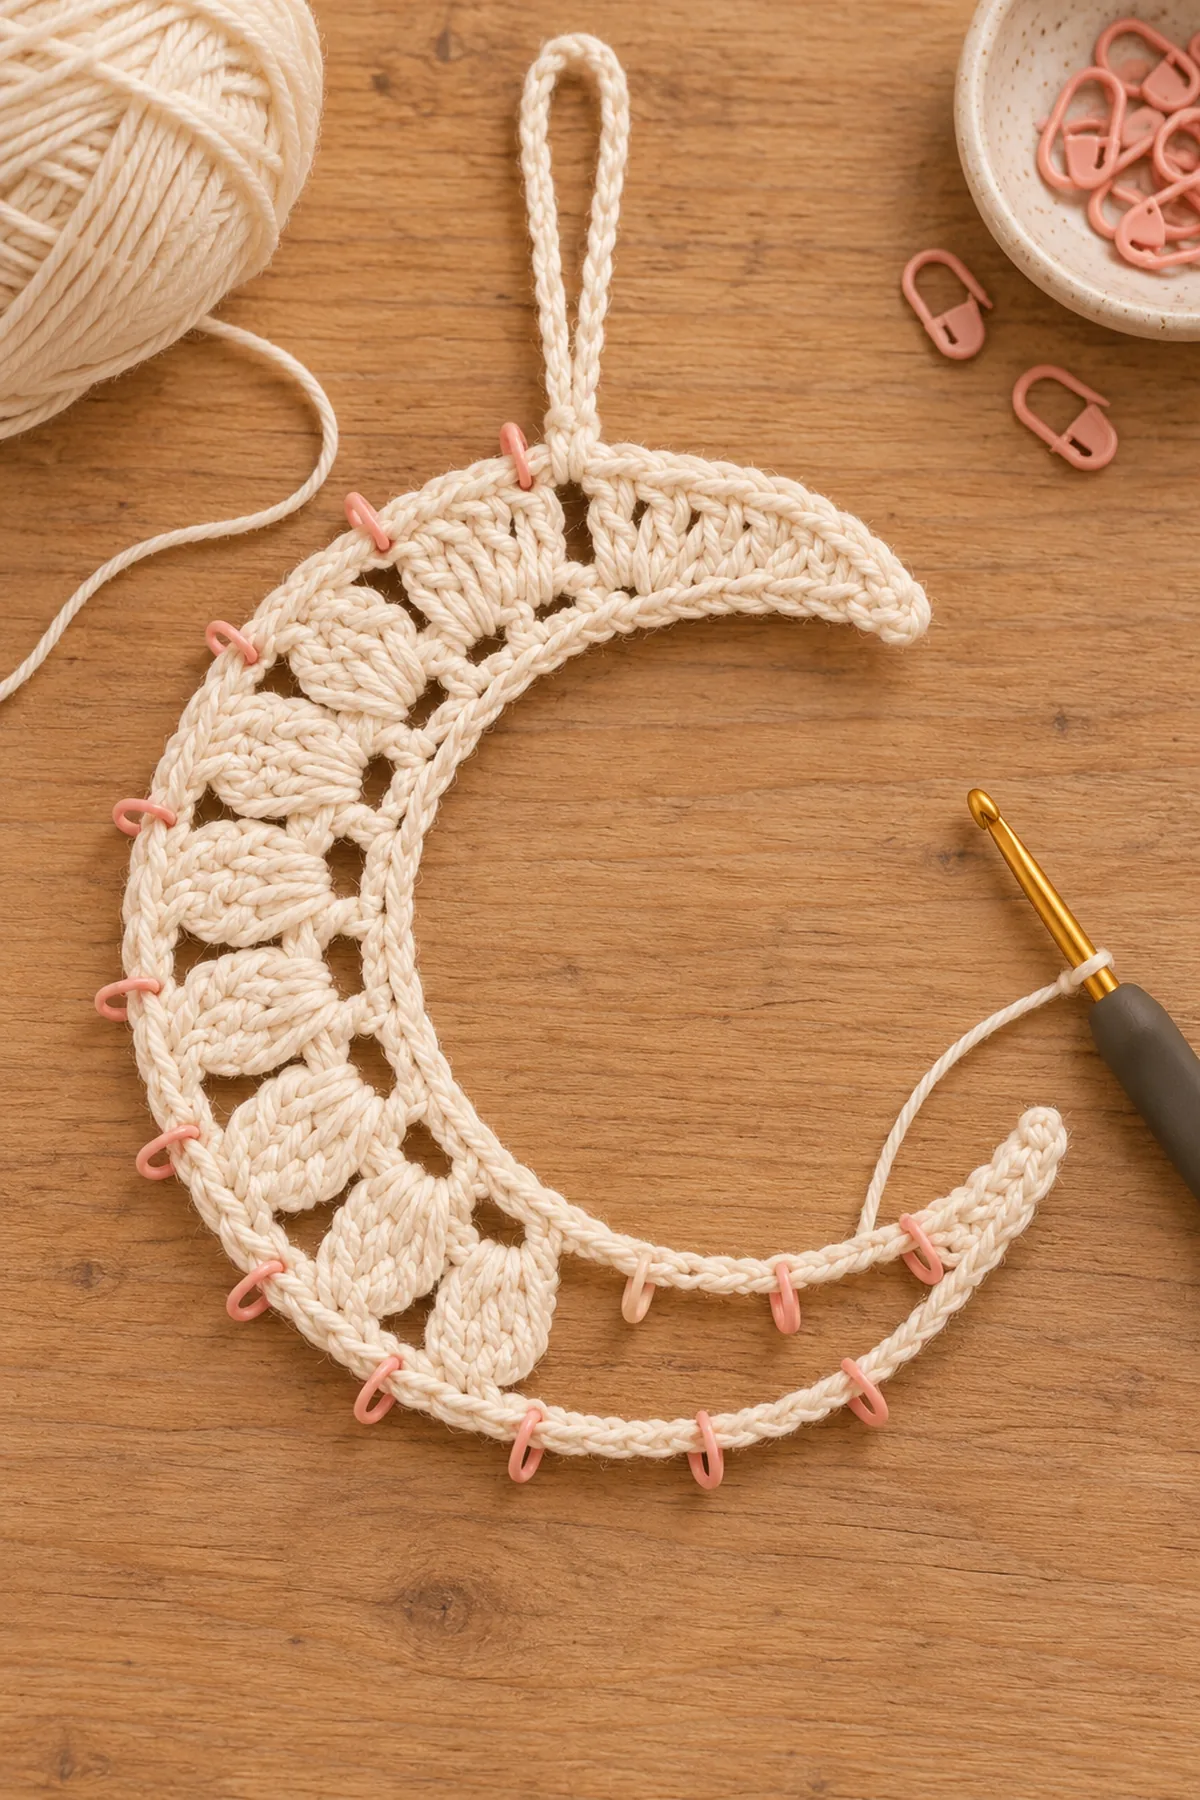
- Place a marker after every third stitch to divide the row into exactly twelve equal sections.
- Row 3: Ch 1 and turn. Work [sc in next stitch, ch 2, skip next stitch, sc in next stitch] across all twelve sections. You now have twelve marked chain-2 spaces.
- Lay the strip in a shallow C shape with the opening toward the right. Keep the first and last sections relaxed because they will become the pointed tips.
Build Twelve Radiating Open Fan Wedges
Increase inside every marked space so the outer edge becomes longer than the inner curve.
- Row 4: In each chain-2 space work 2 dc, ch 2, 2 dc. Place one sc between neighboring fans. Complete exactly twelve fans.
- Row 5: In every fan center work one radiating puff, ch 3, one radiating puff. Anchor each pair with a front-post sc around the previous separator.
- Row 6: Work 3 dc, ch 3, 3 dc into every center opening. Keep the first and last fans one stitch shorter than the middle ten so the tips begin narrowing.
- Row 7: Work one open arch over every six-double-crochet group, using ch 4 at the two end fans and ch 5 across the middle ten.
- Row 8: Fill the middle ten arches with 7 dc each. Fill the first and last arches with sc, hdc, 3 dc, hdc, sc to create tapered end wedges.
Shape and Edge the Crescent
A continuous outline stabilizes the lace and sharpens both ends.
- Rotate the work and slip stitch evenly down the first tapered edge. Work 3 sc in the tip stitch, then sc along the complete inner curve without stretching it.
- At the second tip, work 3 sc in one stitch. Continue along the outer curve, placing one sc in every double crochet and two sc in each chain-3 or chain-5 arch.
- Join at the first tip and work one final surface-slip-stitch line around the outer curve only. This firm line should follow the broad C shape without pulling the fans closed.
- Fasten off and pin both tips toward the right, with the upper point slightly higher and shorter than the lower point.
- Measure the center opening and adjust the inner edge until it forms one smooth crescent rather than a complete circle.
Crochet the Gold Five-Point Star
Keep the star small enough to swing inside the crescent opening.
- With camel gold, make a magic ring and work 10 sc into it. Join. (10 sts)
- For each point, ch 6. Starting in the second chain, work sl st, sc, hdc, dc, tr; anchor with a slip stitch in the next two-stitch sector.
- Repeat the point sequence five times, keeping all five points equal and leaving the center flat.
- Work one surface-slip-stitch round around the star outline if extra firmness is needed, then block it to approximately 2.25 inches across.
- With gold, ch 16 and slip stitch back through all chains to make a short suspension cord. Sew one end to the star’s top point.
Attach the Star and Hanging Loop
Center both cords so the finished ornament hangs upright.
- Pin the free end of the gold suspension cord to a solid stitch near the upper inner curve. Adjust its length until the star hangs near the center of the open crescent without touching either edge.
- Sew the cord through the same solid crescent stitch at least four times, then hide the tail along the ivory edging.
- For the hanging loop, hold ivory yarn double and ch 54. Slip stitch back through each chain, fold the cord in half, and sew both ends to the top outer edge directly above the crescent’s balance point.
- Hang the ornament temporarily and shift the loop one stitch if the points tilt away from the reference angle.
- Wet-block or lightly stiffen the completed ornament, pinning all twelve fans open, both tips sharp, the star flat, and the loop straight.
Assembly and Shaping
Finish the crescent as one continuous ivory piece with twelve radiating open fans and two right-facing tips. Block it before attaching anything. Sew one short gold cord to the upper inner curve and hang one five-point star in the center opening. Add one doubled ivory hanging loop at the top outer edge, then perform a final light blocking so the moon hangs upright and the star remains free.
Lay every component on a flat surface before joining. Match the marked centers first, then divide each remaining edge into equal sections. Work through both layers with consistent tension and pause after each section to check that the fabric lies flat. This measured approach prevents twisting and keeps decorative details facing the intended direction.
Finishing
- Weave ivory tails through the firm edging rather than the open fan chains.
- Hide gold tails behind the star center and suspension cord.
- Pin every fan opening to equal width during blocking.
- Apply stiffener sparingly so the cotton remains textured rather than glossy.
- Dry completely on the blocking surface before lifting the ornament by its loop.
For a polished result, weave each tail through several same-color stitches, reverse direction once, and trim only after the fabric has been gently stretched. Block to the listed dimensions without flattening textured stitches. Inspect joins, borders, straps, and decorative pieces before the project is used or gifted.
Helpful Tips
- Use twelve stitch markers before beginning the fan row; correcting a missed section later is difficult.
- Keep the inner edge slightly snug and the outer fan edge relaxed to encourage the crescent curve.
- If the moon closes into a circle, spread the outer wedges farther apart and repin the two tips.
- If the star twists, shorten the suspension cord by one or two chains and sew through the top point twice.
Good lighting and a contrasting stitch marker make counting much easier. If a section looks uneven, compare the current count with the previous checkpoint before continuing. Fixing one missed stitch early is faster than compensating later, and it preserves the measurements used by the assembly instructions.
Frequently Asked Questions
How many fan wedges are in the supplied design?
Use exactly twelve radiating open fans between the firm inner and outer crescent edges.
Why does my crescent lie flat like a straight strip?
The outer fan edge needs more width than the inner foundation. Recheck the full fan groups and spread them while blocking.
Can I add more stars?
Not for this reference design. It uses one small gold five-point star hanging inside one ivory crescent.
Do I need wire?
No. Mercerized cotton, firm edging, and light stiffener are enough when the ornament is blocked completely dry.
Conclusion
One ivory C-shaped moon, twelve radiating fan wedges, two pointed tips, one camel-gold five-point star, one short gold suspension cord, and one doubled ivory hanging loop recreate the airy Christmas ornament shown in the supplied photo. Precise section counting and blocking are what give the simple materials their crisp celestial silhouette.
Printable Crochet Pattern Card
Project: Crochet Crescent Moon & Star Christmas Ornament
Skill level: Intermediate Hook: 2.75 mm Yarn: Sport
Finished size: Approximately 8.5 inches wide by 9 inches tall, excluding the hanging loop
Card Materials
- About 165 yards warm-ivory sport-weight mercerized cotton for the crescent and hanging loop
- About 35 yards camel-gold sport-weight cotton for one dangling star and its suspension chain
- 2.75 mm crochet hook
- Yarn needle, scissors, twelve locking stitch markers, tape measure, blocking mat, and rustproof pins
- Optional diluted fabric stiffener or starch for a crisp tree ornament
Card Instructions
- Establish the Curved Inner Crescent Edge: Work a 36-stitch inner edge and divide it into twelve marked chain spaces.
- Build Twelve Radiating Open Fan Wedges: Expand all twelve marked spaces into radiating fan wedges, shortening the two end fans for pointed tips.
- Shape and Edge the Crescent: Outline both curves, sharpen the two right-facing tips, and block one clean C-shaped moon.
- Crochet the Gold Five-Point Star: Make one 2.25-inch camel-gold five-point star and one short matching suspension cord.
- Attach the Star and Hanging Loop: Suspend the gold star inside the crescent and add one centered doubled ivory hanging loop.
Finish: Check every count, weave in all ends, block to measurement, and inspect each join.