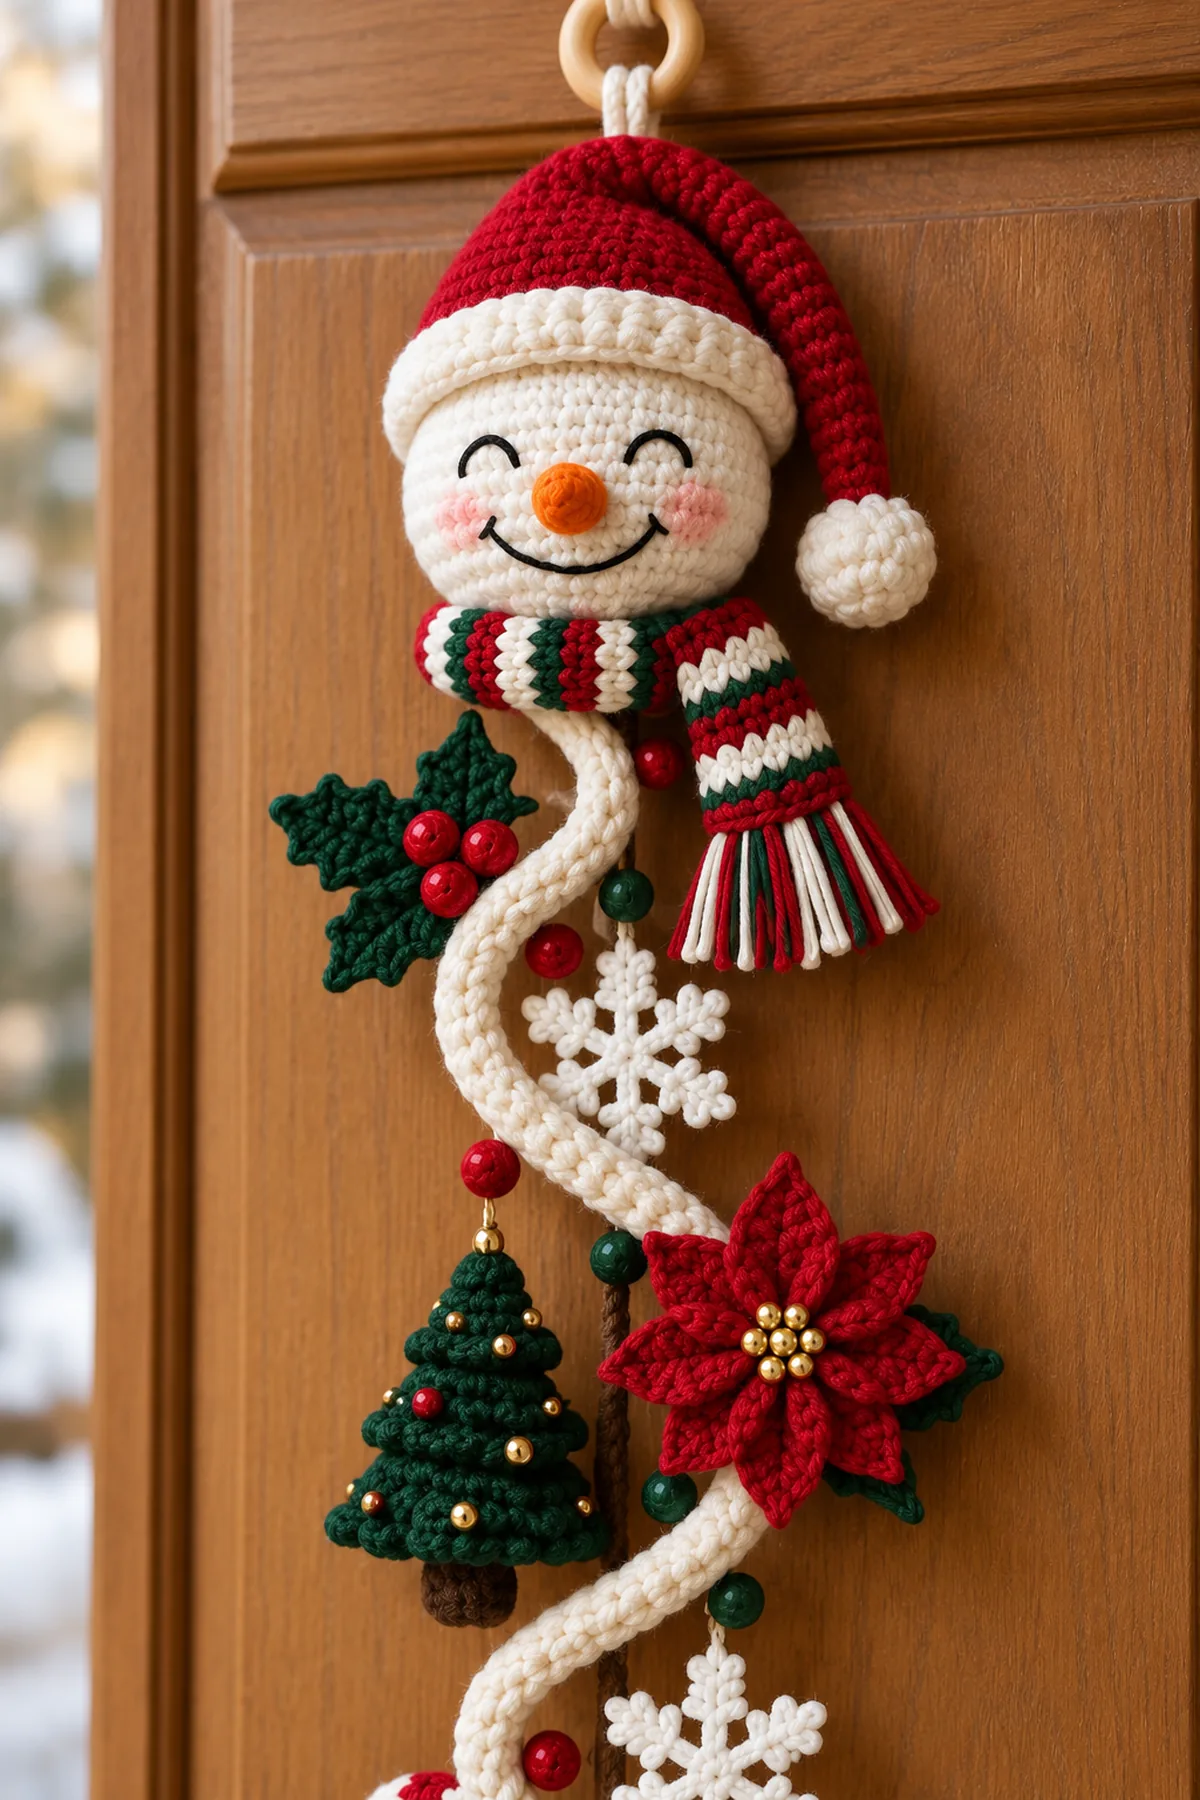
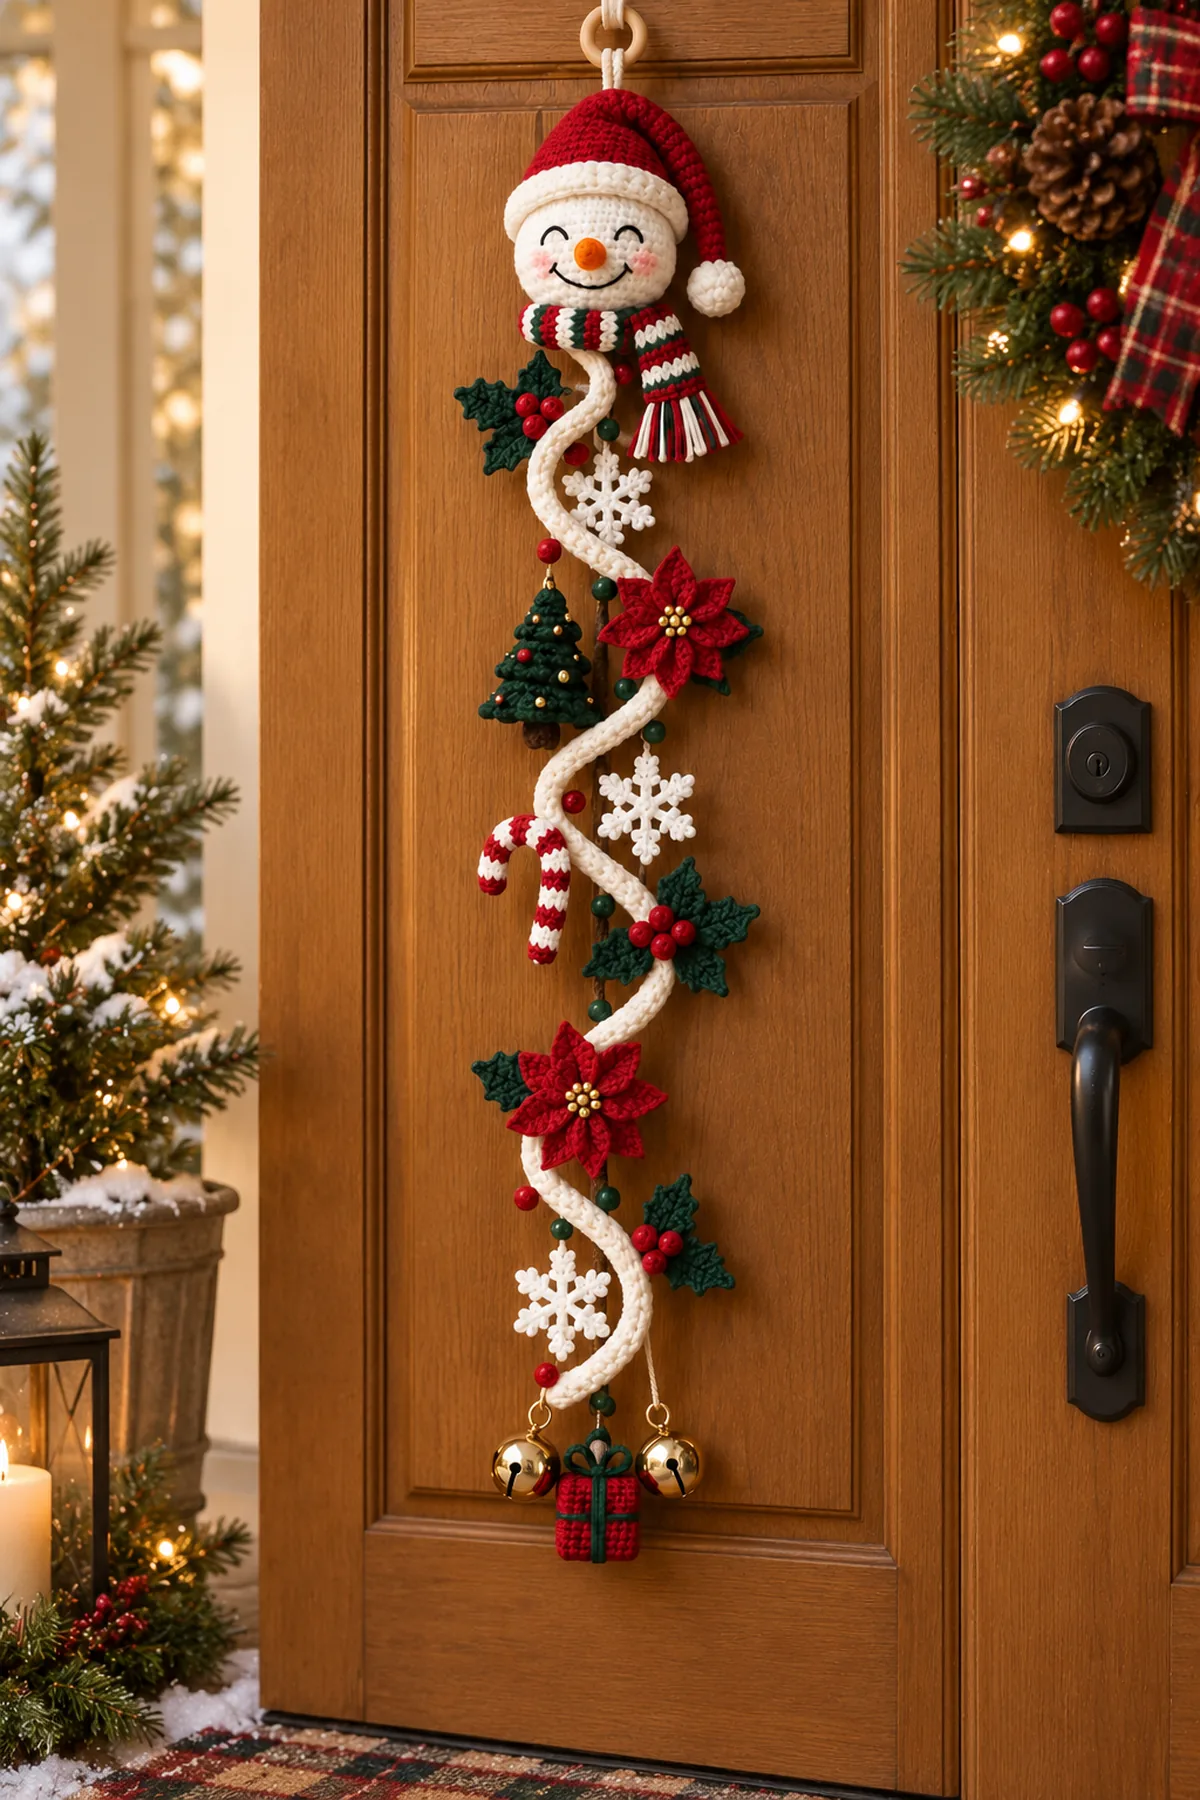
This Christmas Snowman Spiral Door Hanger follows the supplied photo as a long, dimensional holiday decoration rather than a flat banner. A smiling snowman head in a red Santa hat sits above a cream crochet ribbon that winds in four broad S-curves around a slim brown center cord. The same vertical arrangement is preserved with three snowflakes, two poinsettias, three holly clusters, one tree, one candy cane, six small accent bobbles, two gold bells, and one tiny gift. The hanging ring, reinforced center cord, and securely sewn motifs help the finished piece stay balanced on a front or interior door.
Thank you for reading this post, don't forget to subscribe!Crochet and lightly stuff the snowman head first, then add the face, carrot nose, Santa hat, and striped scarf. Make one reinforced brown center cord and one long cream strip, blocking the strip into four alternating S-curves around the cord. Crochet every decorative motif separately and pin the complete layout before sewing: holly and one snowflake near the top, the tree and first poinsettia below, the candy cane, second snowflake, and middle holly at center, then the second poinsettia, lower holly, and third snowflake. Finish the bottom with two real jingle bells flanking one tiny wrapped gift.
Why You’ll Love This Project
The pattern combines small portable motifs with a dramatic finished length, making it easy to crochet in short sessions. Repeated leaves, berries, petals, and snowflake arms build confidence, while the bells add gentle movement at the door. Traditional cream, red, green, white, brown, orange, black, and gold keep the result festive without changing the reference design.
Materials
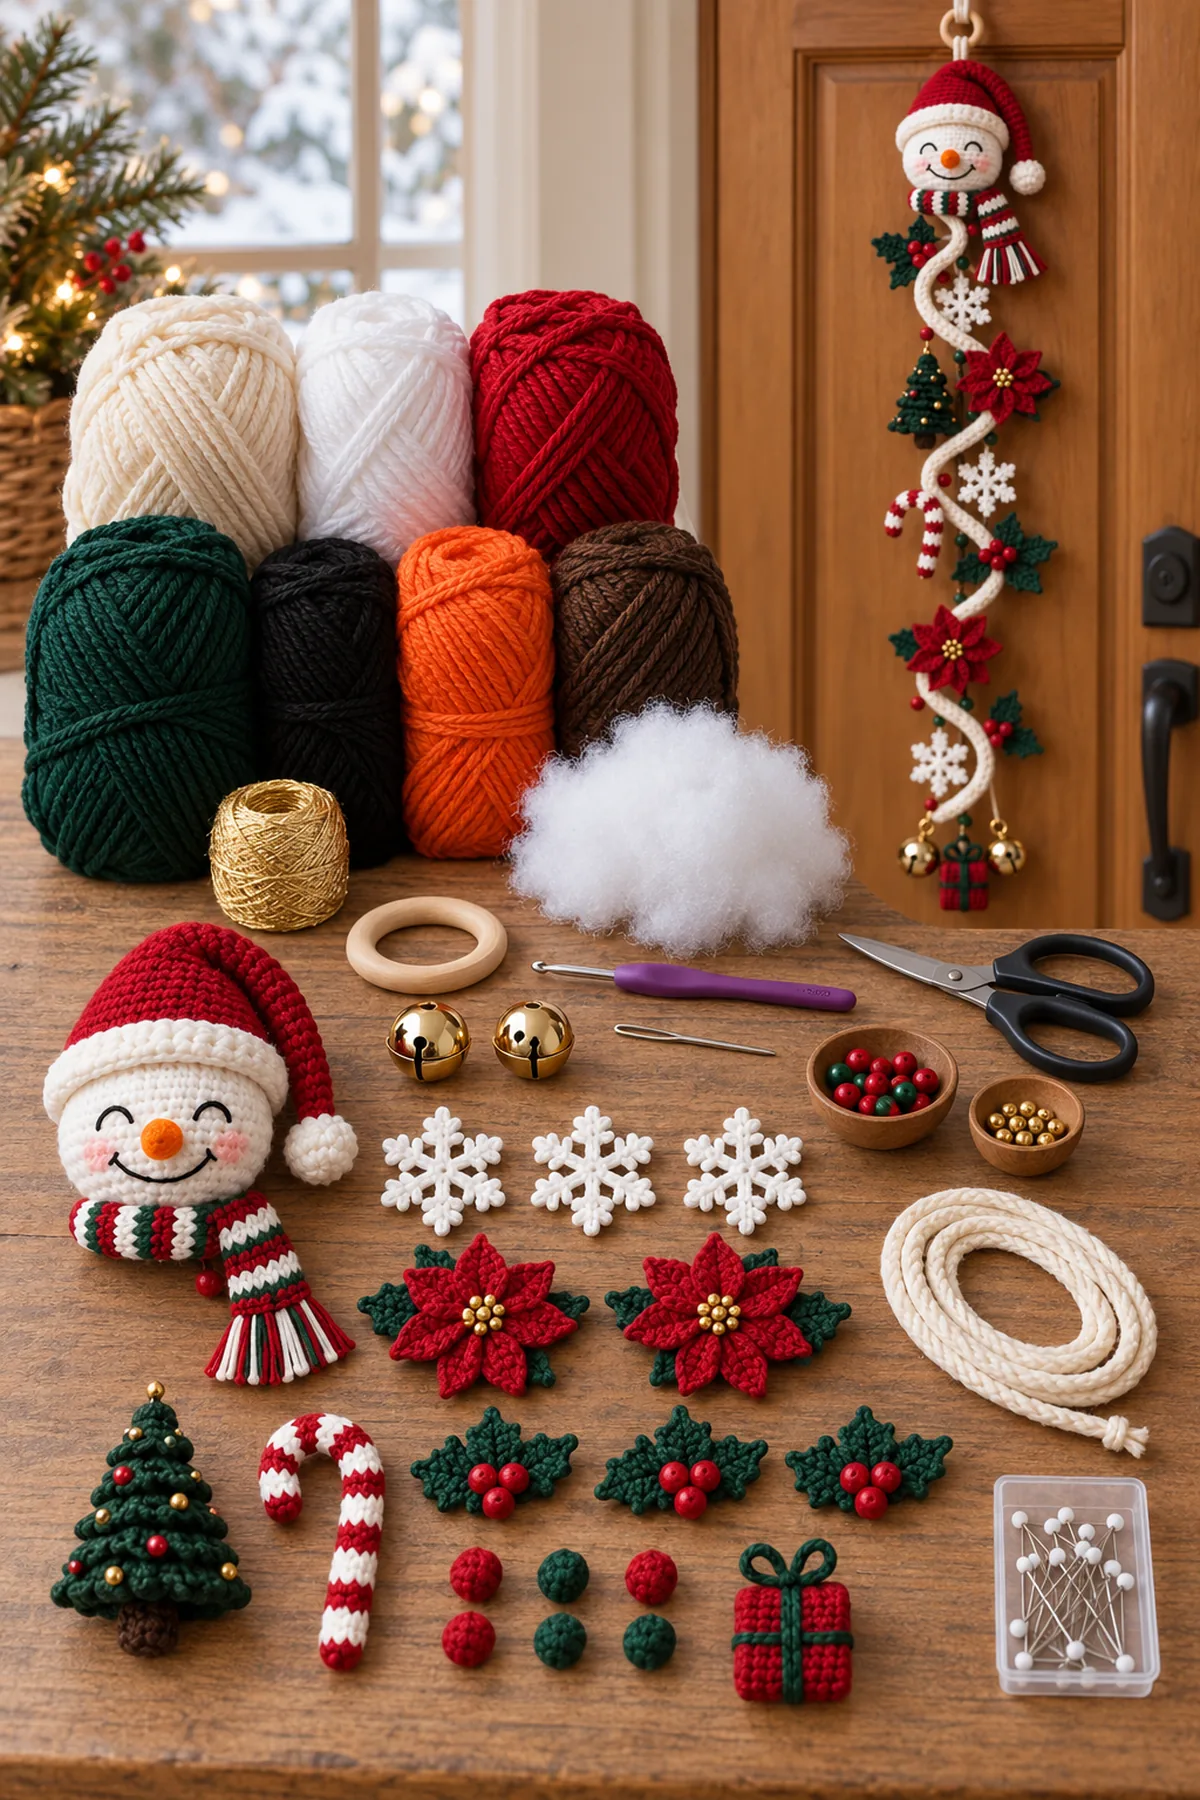
- DK or worsted cotton yarn in cream, white, red, dark green, black, orange, brown, and small amounts of gold
- 3.0–4.0 mm crochet hook; use 3.5 mm for the stated gauge
- Yarn needle
- Scissors
- Stitch markers
- Washable fiberfill
- One small wooden ring or sturdy hanging loop
- Two small gold jingle bells
- Optional red beads for the nine holly berries and small gold beads for the two poinsettia centers
- Strong cord for hanging and strong sewing thread for the bells
- Blocking mat, rustproof pins, and tape measure
Gauge, Measurements, and Planning
Work the first 36 stitches of the cream strip and confirm that they measure 8 inches before continuing. The completed 160-stitch strip should be long enough to form four broad alternating curves over a 34-inch visible section of the brown support cord. Block the snowman head to about 6 inches across and each poinsettia to about 4 inches before final placement.
Make and wash a gauge swatch before beginning. Measure only after the swatch is completely dry. If the stitch width differs, change hook size rather than pulling the working yarn tighter. Keep a written count at the end of every section so the finished edges remain balanced and the assembly points line up.
Abbreviations and Special Stitches
- ch: chain
- sc: single crochet
- hdc: half double crochet
- dc: double crochet
- tr: treble crochet
- sl st: slip stitch
- st(s): stitch(es)
- inc: increase
- dec: decrease
Special stitch guidance: Broad spiral strip: work a firm two-row cream band and pin it into four alternating S-curves around the brown support cord rather than twisting it into a tight corkscrew. Poinsettia point: work sc, hdc, dc, tr, dc, hdc, sc around one chain foundation to form a sharp red petal. Snowflake arm: chain outward, add two short side branches, and slip stitch back to the center. Holly leaf: mirror graduated stitches around both sides of a foundation chain and surface-slip-stitch the center vein. Berry bobble: close five unfinished double crochet together and shape the cluster into a small sphere.
Before You Begin
- Make exactly one snowman head, one red Santa hat, one striped scarf, one brown support cord, and one cream four-curve spiral strip.
- Keep the vertical order and side placement shown in the supplied photo; do not replace the spiral with a solid panel or wreath.
- Make exactly three white six-arm snowflakes, two red poinsettias, three holly clusters, one small tree, one candy cane, one gift, two gold bells, and six small accent bobbles.
- Every holly cluster has two dark-green leaves and three red berries; each poinsettia has eight red petals, two green leaves, and a small gold center.
- Embroider closed eyes and the smiling mouth in black and use one orange stuffed carrot nose; do not add buttons or a full snowman body.
- Secure all beads and bells with strong thread. The finished hanger is decorative and is not a toy.
Instructions
Crochet the Snowman Head, Face, Hat, and Scarf
Complete the entire top character before building the hanging spiral beneath it.
- Head front: With white, make a magic ring and work 6 sc. Increase evenly through six rounds to 42 stitches, then work two even rounds. Fasten off. Make a matching back circle.
- Embroider two closed curved eyes and one smiling mouth in black on the front circle. For the orange nose, work 6 sc into a ring, then work three rounds while decreasing gradually to a point. Lightly stuff and sew it at the center. Add two small red surface-stitch cheek circles.
- Place the two head circles wrong sides together, join with sc around, add a small amount of fiberfill before closing, and shape to approximately 6 inches across.
- Santa hat: With red, begin at the tip with 6 sc and increase gradually to fit the upper half of the head. Add a folded white brim and one white pom-pom at the long curved tip. Sew the hat securely across the upper head edge.
- Scarf: Work a narrow 20-inch striped strip, alternating red, white, and dark green every two rows. Wrap it once below the face, tack the crossing point, and finish both ends with short matching tassels on the viewer’s right.
Build the Brown Support and Four-Curve Cream Spiral
A hidden vertical support keeps the long decoration straight while the cream strip creates the visible motion.
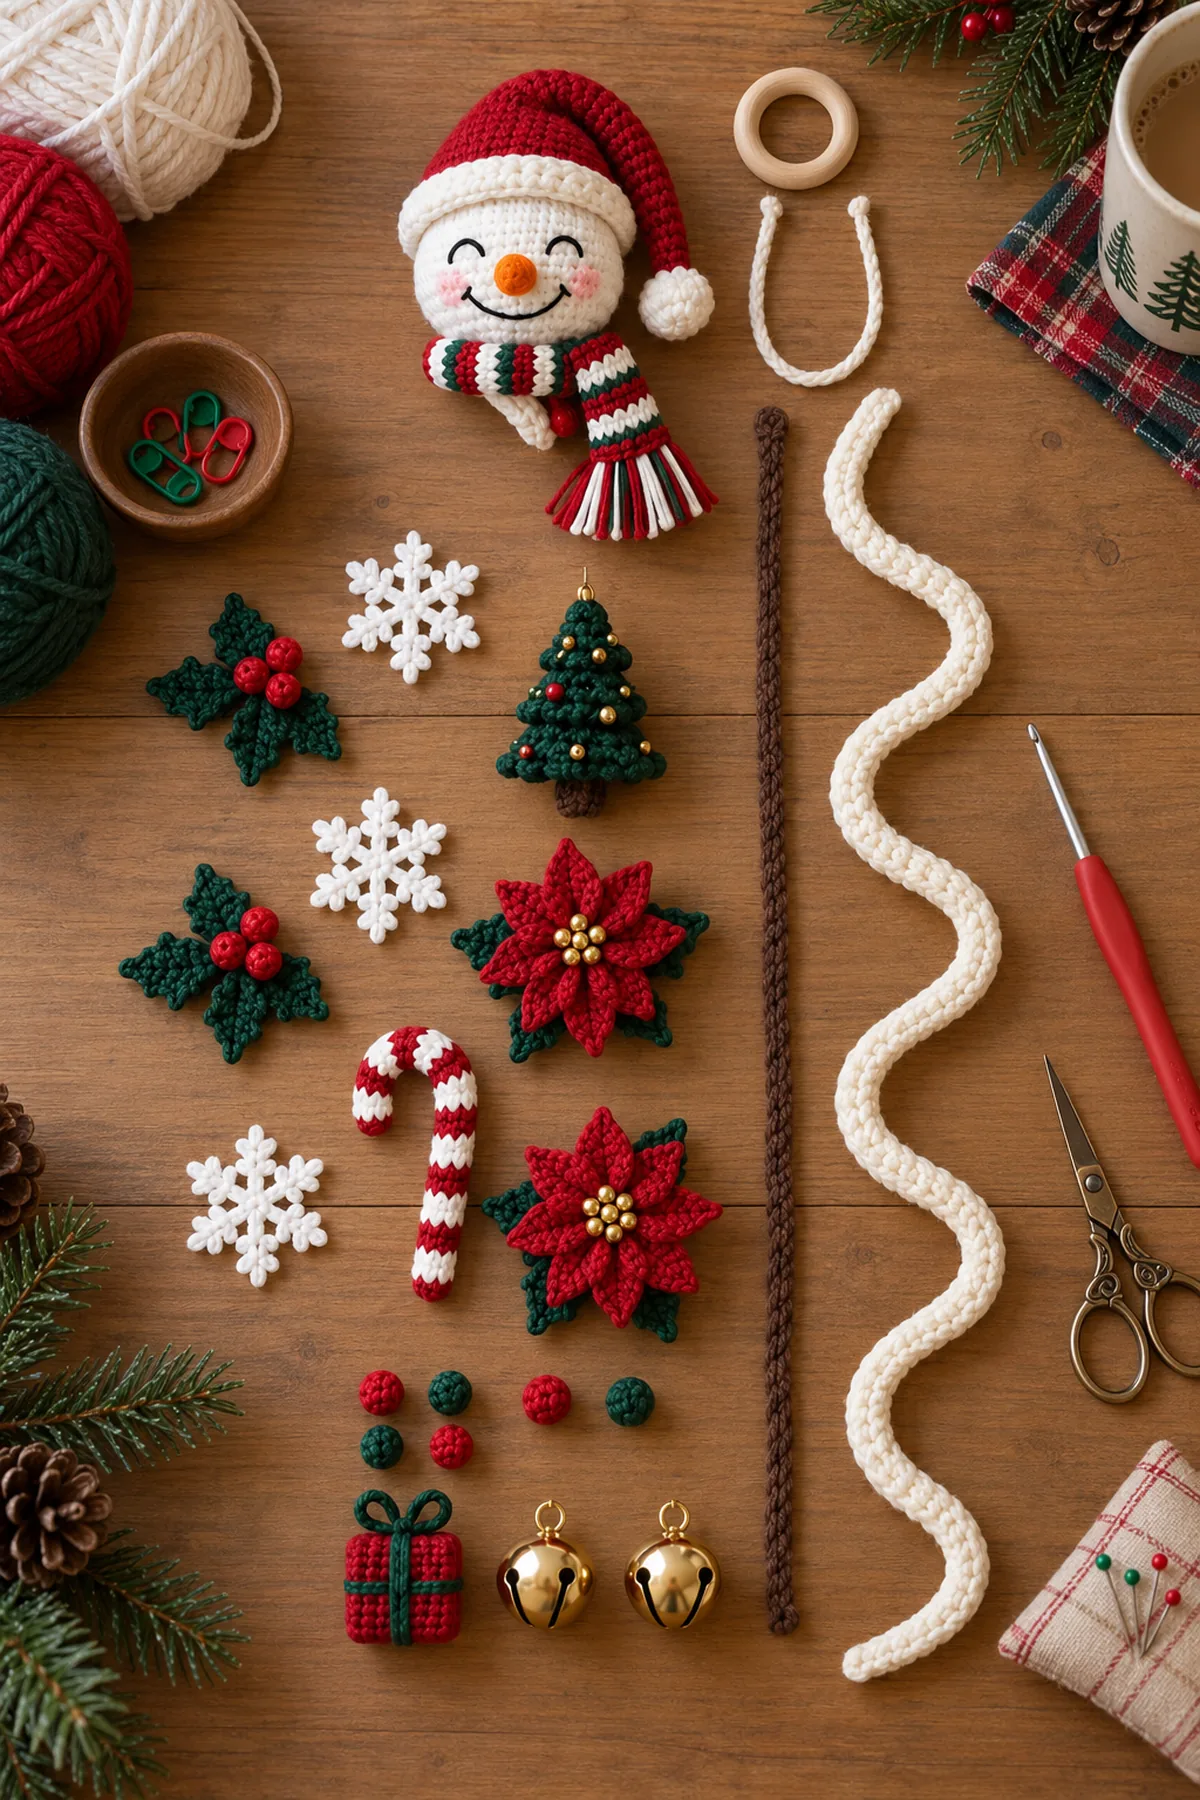
- With brown, ch 181 and slip stitch back through every chain without twisting. Fasten off with long tails. This reinforced cord should measure about 36 inches and will form the center support.
- With cream, ch 162. Beginning in the third chain, hdc across. (160 sts)
- Row 2: Ch 2, turn, and work one hdc in every stitch. (160 sts) Fasten off with a long sewing tail at both ends.
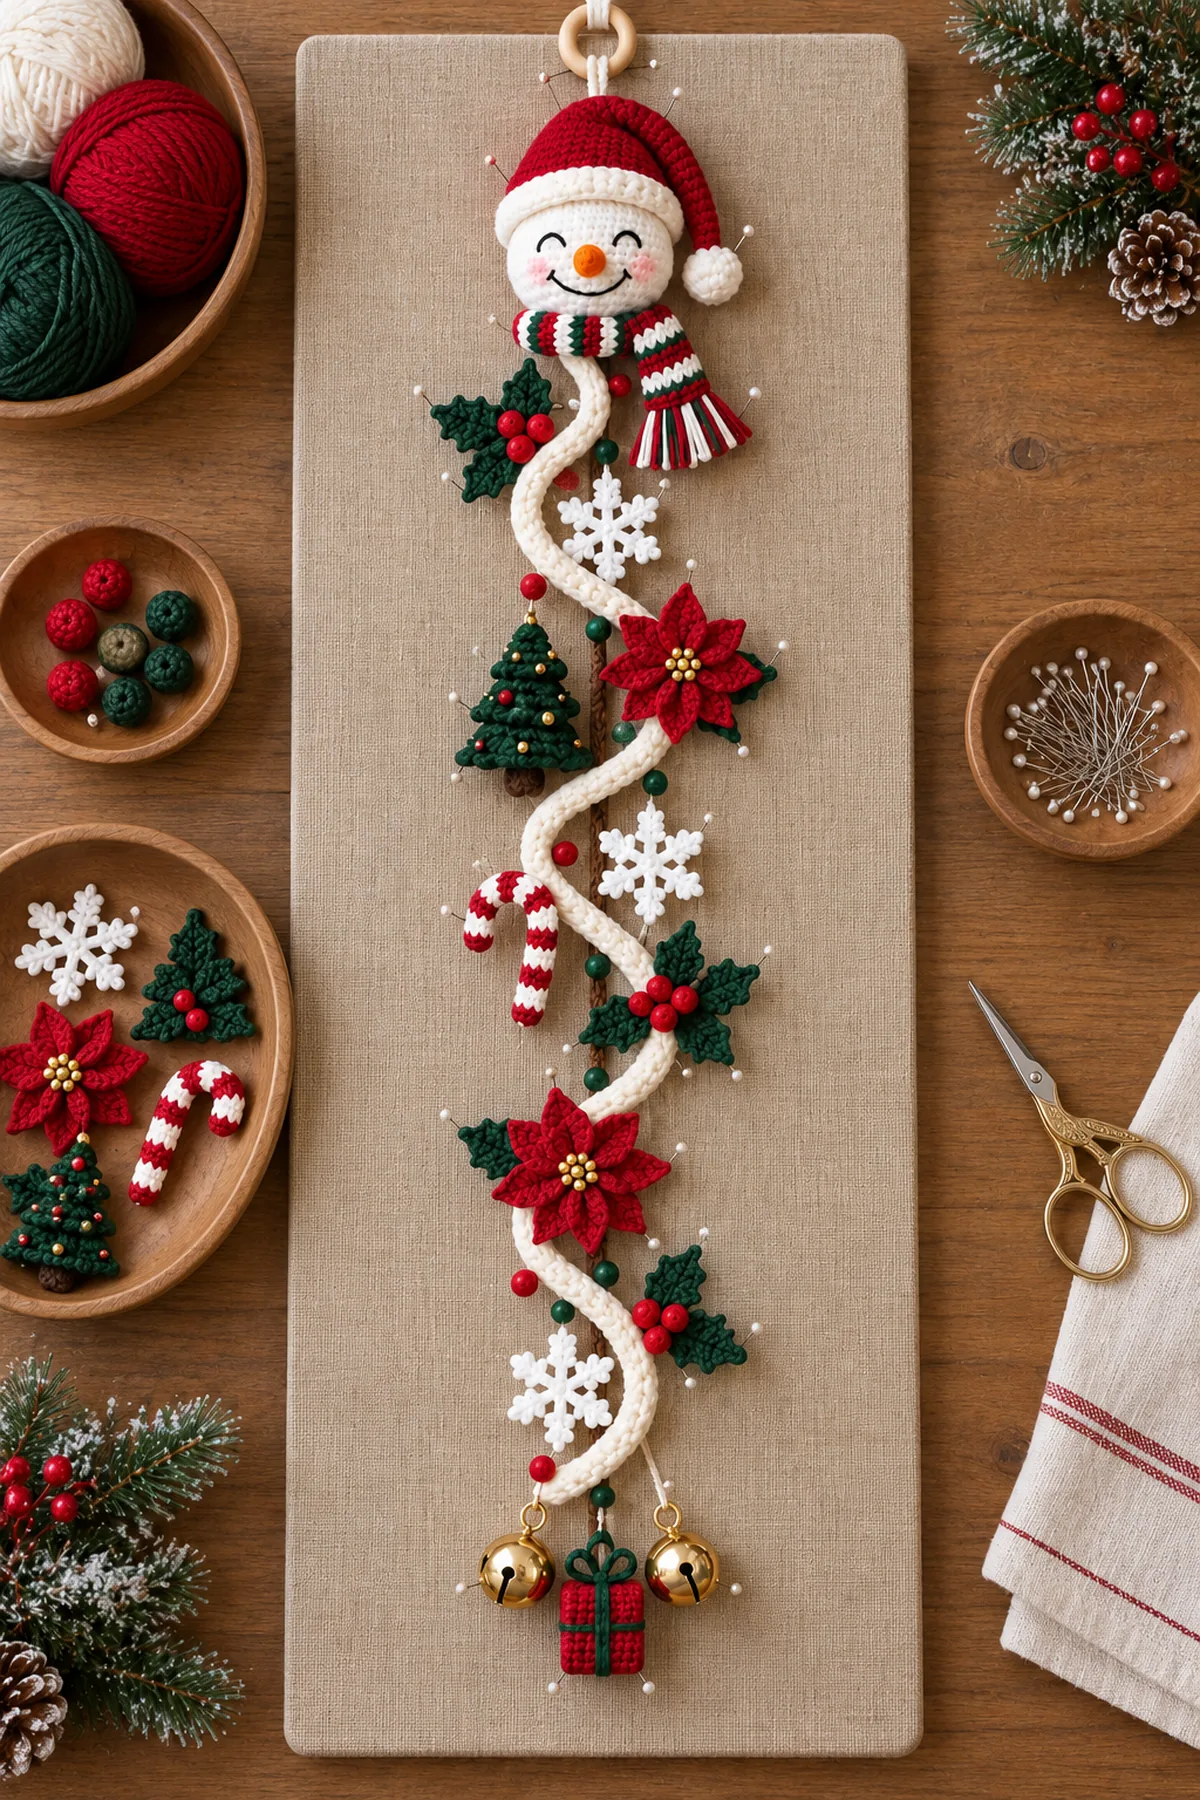
- Lay the brown cord vertically. Pin the cream band over it in exactly four broad alternating S-curves, keeping the curves open and evenly spaced rather than tightly coiled.
- Tack the cream band to the support at the top and bottom of every curve. Leave the outer arcs free enough to look dimensional but secure every crossing point from the back.
Crochet the Counted Christmas Motifs
Make every applique separately so the complete reference layout can be tested before sewing.
- Make exactly three white snowflakes. For each, work a small center ring and six matching branched arms, then block to about 3 inches across.
- Make exactly two red poinsettias. Each flower has eight pointed red petals, two dark-green leaves behind it, and one small gold bobble or bead cluster at the center.
- Make exactly three holly clusters. Each cluster uses two veined dark-green leaves and three red berry bobbles or securely sewn beads.
- Make one small dark-green tree with three stacked triangular tiers, a short brown trunk, and six tiny gold knot decorations. Make one red-and-white striped candy cane with a firmly curved top.
- Make six small round accent bobbles, three red and three dark green. Crochet one tiny red rectangular gift with a dark-green cross ribbon and bow. Set aside two small gold jingle bells for the lower finish.
Arrange, Sew, and Hang the Decoration
Pin every element in the photo’s vertical sequence before making permanent joins.
- Sew the snowman head to the top of the brown support cord. Attach the cream spiral directly beneath the scarf so the first curve begins at the centerline.
- Upper section: Place one holly cluster on the viewer’s left and one snowflake inside the first curve. Place the small tree on the left and the first poinsettia on the right below them.
- Middle section: Place the candy cane on the left, the second snowflake on the right, and the second holly cluster on the right side of the next curve. Distribute three red-green accent bobbles between these motifs.
- Lower section: Place the second poinsettia on the left, the third holly cluster on the right, and the third snowflake on the left near the lowest curve. Add the remaining three accent bobbles while keeping the cream path visible.
- Attach the tiny red gift at the bottom center and suspend one gold jingle bell on each side with strong thread. Connect strong hanging cord from the top of the head to one small wooden ring, then hang overnight and adjust until the center cord remains vertical.
Assembly and Shaping
Block the snowman head, cream strip, and all appliques separately. Use the brown cord as a straight centerline and shape the cream strip into four alternating S-curves. Attach the snowman at the top, then work downward in the exact reference sequence: upper holly and snowflake, tree and first poinsettia, candy cane and second snowflake, middle holly, second poinsettia, lower holly, third snowflake, and the final bell-and-gift cluster. Keep all three snowflakes, both flowers, all three holly clusters, the single tree, and the single candy cane readable rather than overlapping them.
Lay every component on a flat surface before joining. Match the marked centers first, then divide each remaining edge into equal sections. Work through both layers with consistent tension and pause after each section to check that the fabric lies flat. This measured approach prevents twisting and keeps decorative details facing the intended direction.
Finishing
- Weave color-matched tails into the backs of dense motifs.
- Reinforce the snowman-to-cord, spiral crossing, wooden-ring, and bell joins twice.
- Steam the cream curves lightly without flattening their raised edges.
- Shape the hat tip, scarf tassels, poinsettia petals, holly leaves, candy-cane hook, and snowflake arms by hand.
- Hang the completed decoration overnight and move only the hidden tacking stitches if the bells do not sit level.
For a polished result, weave each tail through several same-color stitches, reverse direction once, and trim only after the fabric has been gently stretched. Block to the listed dimensions without flattening textured stitches. Inspect joins, borders, straps, and decorative pieces before the project is used or gifted.
Helpful Tips
- Photograph the fully pinned layout before sewing so the reference spacing is easy to preserve.
- Use cotton yarn for crisp motifs and only enough fiberfill to round the face without making it heavy.
- If the cream strip sags, add one hidden tack at the midpoint of the affected outer curve.
- Use lightweight bells and a sturdy interior-door hook so movement does not stretch the snowman head.
Good lighting and a contrasting stitch marker make counting much easier. If a section looks uneven, compare the current count with the previous checkpoint before continuing. Fixing one missed stitch early is faster than compensating later, and it preserves the measurements used by the assembly instructions.
Frequently Asked Questions
How many curves should the spiral have?
Shape the cream band into exactly four broad alternating S-curves around the straight brown support cord.
Can I replace the snowman with a full body?
Not for this reference design. It uses one round snowman head with a Santa hat and scarf above the spiral, without a torso or button row.
How many decorative motifs are required?
Use three snowflakes, two poinsettias, three holly clusters, one tree, one candy cane, six small accent bobbles, one gift, and two jingle bells.
Can I use beads for the berries?
Yes. Secure red beads with strong thread, or crochet nine small berry bobbles if the hanger may be handled often.
Conclusion
One smiling Santa-hat snowman head, one striped scarf, one brown support cord, one four-curve cream spiral, three snowflakes, two poinsettias, three holly clusters, one tree, one candy cane, six accent bobbles, one gift, and two gold bells reproduce the tall Christmas door hanger shown in the supplied photo. Careful counted placement keeps the elaborate decoration balanced while preserving the open, playful spiral silhouette.
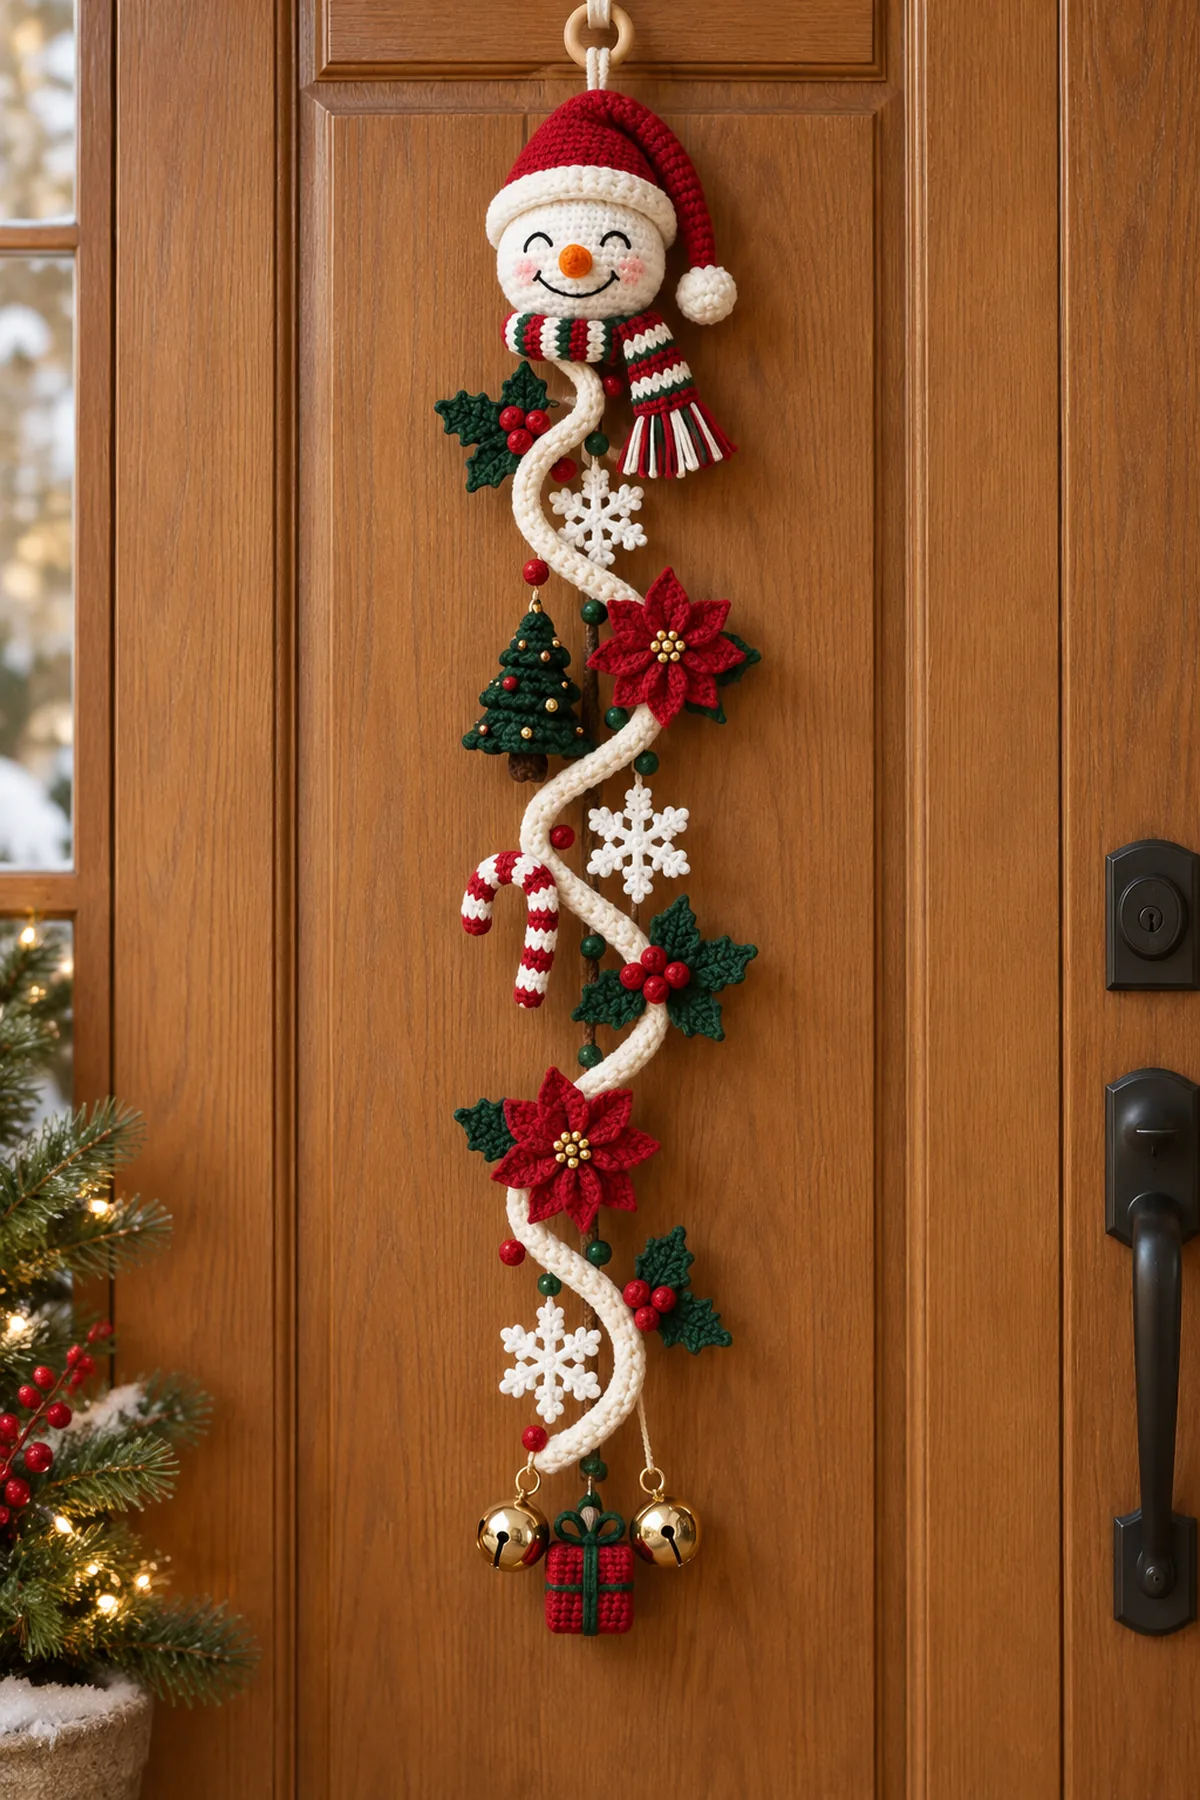
Printable Crochet Pattern Card
Project: Christmas Snowman Spiral Door Hanger
Skill level: Intermediate Hook: 3.5 mm, or 3.0–4.0 mm to suit the selected yarn Yarn: DK or Worsted
Finished size: Approximately 8 inches wide by 40 inches long, excluding the hanging ring
Card Materials
- DK or worsted cotton yarn in cream, white, red, dark green, black, orange, brown, and small amounts of gold
- 3.0–4.0 mm crochet hook; use 3.5 mm for the stated gauge
- Yarn needle
- Scissors
- Stitch markers
- Washable fiberfill
- One small wooden ring or sturdy hanging loop
- Two small gold jingle bells
- Optional red beads for the nine holly berries and small gold beads for the two poinsettia centers
- Strong cord for hanging and strong sewing thread for the bells
- Blocking mat, rustproof pins, and tape measure
Card Instructions
- Crochet the Snowman Head, Face, Hat, and Scarf: Make one lightly stuffed smiling snowman head with orange nose, red Santa hat, and one red-green-white striped scarf.
- Build the Brown Support and Four-Curve Cream Spiral: Work a 160-stitch cream band and secure it in four broad alternating S-curves around one brown support cord.
- Crochet the Counted Christmas Motifs: Prepare three snowflakes, two poinsettias, three holly clusters, one tree, one candy cane, six accent bobbles, one gift, and two bells.
- Arrange, Sew, and Hang the Decoration: Sew the motifs in the reference order, add two lower bells and one gift, then attach the snowman to one wooden hanging ring.
Finish: Check every count, weave in all ends, block to measurement, and inspect each join.